How to make your own Google Home with Assistant and Raspberry Pi 3
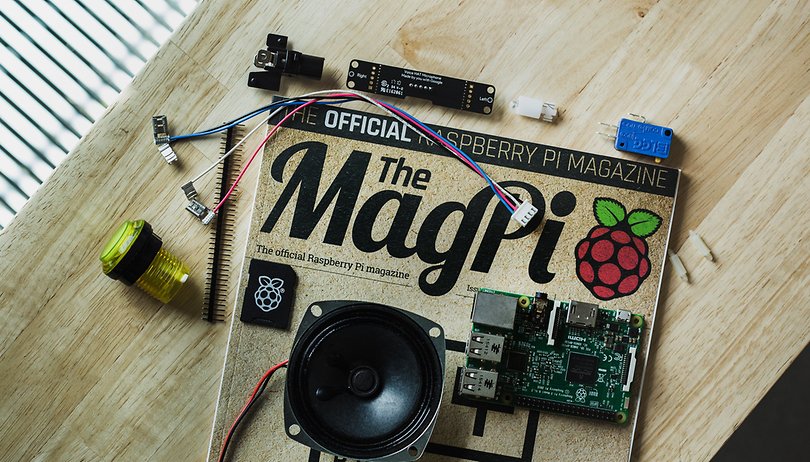

Google home is the easiest way to have Google Assistant in your house. The only bad thing is that it isn’t available worldwide yet, but thanks to Raspberry Pi 3 you can get Google Assistant in your living room. You can even control any device connected to the Raspi with just your voice.
To start using Google Assistant on your Raspberry Pi 3 first, you're going to need a bit of hardware. So, you’ll need to pick up a microphone and speaker to be able to communicate with Google Assistant. In the May issue of MagPi (the official Raspberry Pi magazine), there was a nice set sponsored by Google. However, if you weren’t able to pick it up, no worries. You can use any speaker and USB microphone combo. You'll find the instructions for both situations below:
- Make your own Google Home with the AIY Voice KIT from MagPi
- Make your own Google Home with a microphone, speaker and a Raspberry Pi 3
Make your own Google Home with the AIY Voice KIT from MagPi
As we’ve already mentioned, in the May 2017, issue 57 of The MagPi Magazine, Google included a gift set to inspire people to make their own Google Home. The project called AIY comes from mixing AI (Artificial Intelligence) and DIY (Do it Yourself).
1. Assemble the AIY Project kit “made by you with Google.”
The kit included in The MagPi is very simple to put together. All you need to do is follow the instructions in the magazine or on their AIY Projects website. I think the hardest thing for me was folding the cardboard. To assemble the voice kit, Google gave us:
- PCB to control microphone and switch (Voice HAT)
- Long PCB with two microphones
- Speaker
- Switch
- LED light
- Switch mechanism
- Cables to connect everything
- Cardboard box to assemble the kit
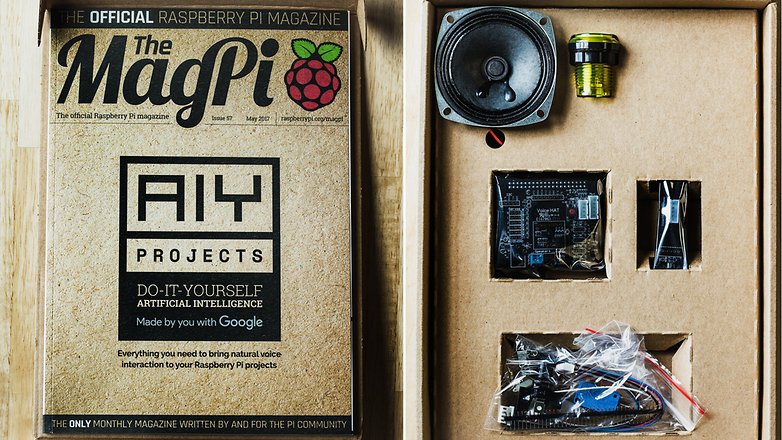
In addition to what comes in the box, you’ll also need:
- A Raspberry Pi 3
- A microSD card to install the operating system
- Some scotch tape
- A P00 size screwdriver
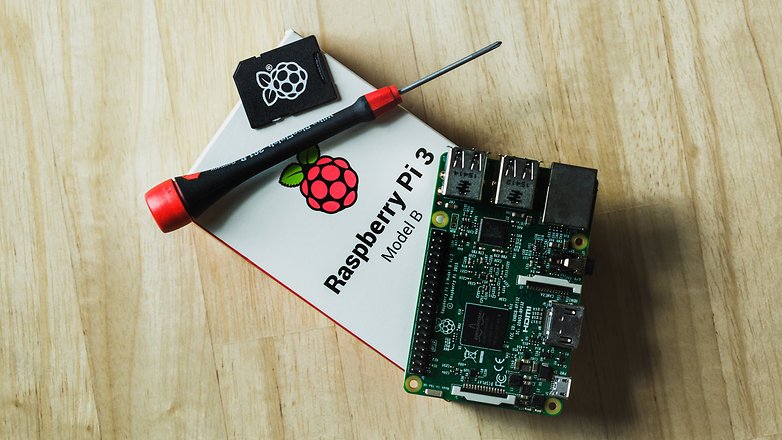
There are instructions on the official website to assemble the AIY kit, but I’ll summarize the main points here.
Once you have everything, start by connecting the PCB, called the Voice HAT, which controls the microphones and switch, to the Raspberry Pi 3 with the help of two small standoffs. Now, with your screwdriver, connect the two speaker cables (red is positive and black is negative).
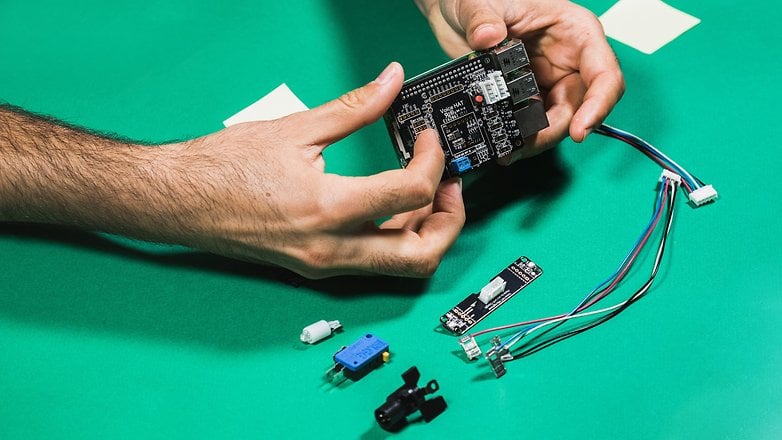
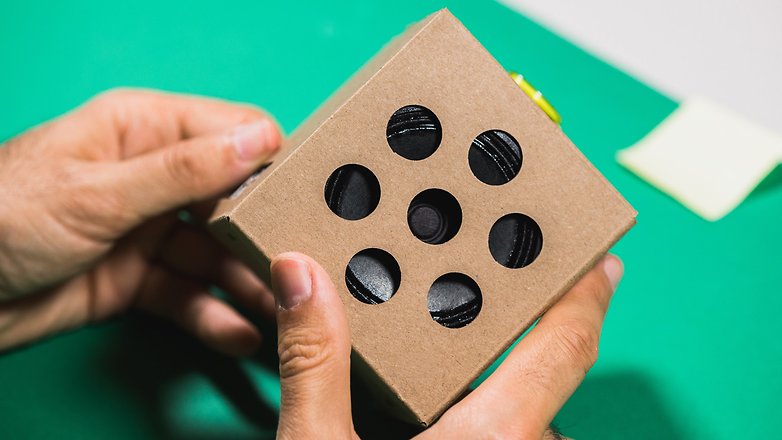
Connect the rest of the cables to the Voice HAT. Now, put everything in the first box. Fold the box with the written words on the outside and put the speaker in first. Next, place the Raspberry Pi 3 together with the Voice HAT. Assemble the box and put everything inside. Make sure the speaker is on the side with the holes.
Now it’s time to attach the switch body (we got a yellow one). First, unscrew the spacer and nut from the button. Insert the button into the hole in the box and screw the spacer and washer back on. Next, put the LED and switch mechanism together. Insert it into the button and carefully connect the cables in the correct order (red and blue outside; black and white center).
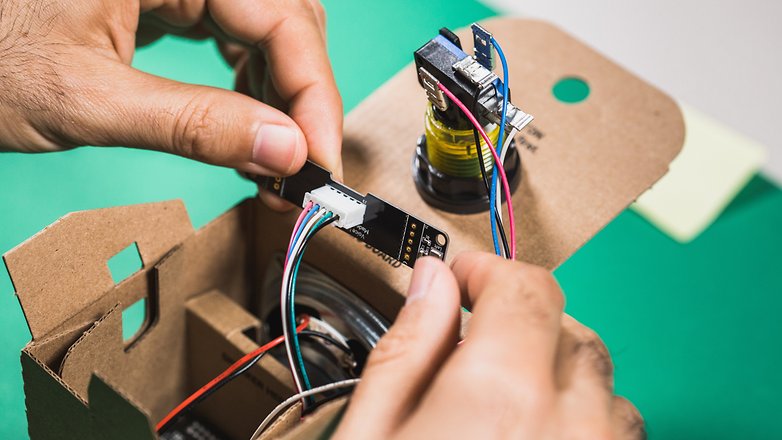
Lastly, connect the PCB with the two microphones and attach it with some scotch tape. Make sure when you attach the microphones that there’s good sound input through the holes in the box. Once everything is assembled and ready, it’s time to install the software onto a microSD card.
2. Install the software and configure Raspbian to use Google Assistant:
To install the software you’ll need to download the system image and write it to a microSD card with a computer:
- Download the Voice Kit SD image
- Download the Etcher.io software for your computer
- Now, unzip the file with the image (*.img) of the Raspberry Pi 3 operating system
- Insert the microSD card into your computer
- Open the Etcher program, select the image, select the microSD card and click ‘Flash.'
- When it’s finished, the microSD card will be ready to be inserted into the Raspberry Pi 3.
When the card is flashed, put it into the Raspi, and we’re ready to get started. To start up the Raspberry Pi 3 with the Voice Kit we’ll need a monitor with an HDMI cable and a keyboard and mouse. Connect everything and power up the Raspi.
The first time it boots could take a couple of minutes. The system running on the Raspberry Pi is a modified version of Debian, made especially for this device, called Raspbian. Debian is one of the largest distributors of GNU/Linux and where distributors like Ubuntu are based.
Once the desktop is active, in the upper right-hand corner between the Bluetooth and volume buttons, connect to your Wi-Fi network. Once it’s connected to the internet, open the browser and type this URL: https://console.cloud.google.com/
It’ll then ask for your Gmail account. We’ll need this to be able to use Google Cloud and by extension, Google Assistant. So, type in your e-mail and password to activate the free account. Now, follow the steps below:
- Create a new project, for example, “Home Pi”
- Enable the Google Assistant API in the project by going to API > Enable API > Google Assistant > Enable
- Now create a new credential in Credentials > Create credentials > OAuth Client ID > Other (add a name) > Create
- We’ll need to download the credential onto the Raspberry Pi 3 from the credential page of our projects API. To the right of the credential you just made, you’ll see a download button.
- Copy the downloaded file from the download folder to the folder /home/pi and change the name to assistant.json it by right-clicking on the file > rename.
3. Talk to Google Assistant through the Raspberry Pi 3
To launch Google Assistant on the Raspberry Pi 3, open the terminal icon on the desktop and type the following command:
- src/main.py.
The first time you run the command, it will ask for permission to use the Google Cloud account connected to our Gmail account. If everything went as planned, then the console will let you know that in order to use voice command, you'll have to press the button first. To exit out of the App press CTRL+C with the terminal window active. Now, you can ask whatever you’d like to that little cardboard box that’s got the complete power of Google Assistant hidden inside.
To control the volume, all you need to do is lower it on the desktop icon in the upper right-hand corner or tell Google Assistant “volume down.”
4. Activate Google Assistant remotely through SSH from another device
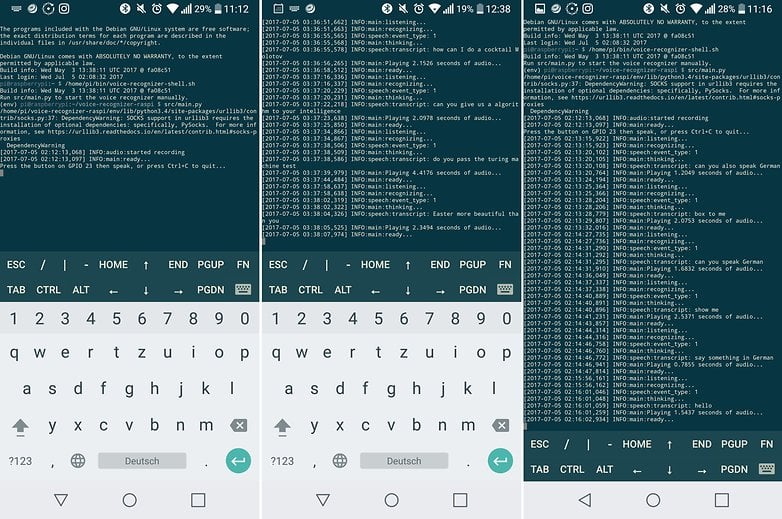
We can activate Google Assistant on the Raspberry Pi 3 without a monitor or keyboard/mouse thanks to SSH and our smartphone. In the Raspi, activate SSH by heading to Start > Preferences > Raspberry Pi Configuration, in the ‘Interfaces’ tab, click ‘Enabled’ in the SSH row. I also recommend changing the Pi user’s default password.
On your smartphone, and with any app that allows SSH connections (or PuTTY from Windows) we can introduce the local IP of the Raspberry Pi 3 and sign in directly from a command console with our username (the default is “Pi”) and password (the default is “raspberry”).
The local IP address of the Raspi can be found in the connection icon on the Raspi desktop or with the app, Fing, for Android.
Once connected to the command line in the Raspberry Pi 3 by SSH, Introduce these two commands to start up Google Assistant:
- /home/pi/bin/voice-recognizer-shell.sh
- src/main.py
Make your own Google Home with a speaker and a Raspberry Pi 3
You don’t have to have the AIY Voice Kit from MagPi to make your own Google Home. Actually, all you really need is a USB microphone, some speakers with a headphone jack and a Raspberry Pi 3 (you can also connect a button if you’ve got one lying around).
I didn’t have a USB mic on hand, so I used an old webcam that had a built-in microphone.
Follow the same instructions above to install the software, but you’ll have to tweak a few things to use your own hardware.
First. Edit the file /boot/config.txt through a terminal with the command sudo nano /boot/config.txt. Now we’ll have to uncomment the line where it says #dtparam=audio=on, erasing the # and comment the two following lines, so the paragraph looks like this. Once finished, press CTRL+X to exit and save it with the same name.
# Enable audio (loads snd_bcm2835)
dtparam=audio=on
#dtoverlay=i2s-mmap
#dtoverlay=googlevoicehat-soundcard
Second. Edit the file /etc/asound.conf, also from the terminal with sudo nano /etc/asound.conf. Here, we’ll need to erase everything and paste the following code. After that’s done, push CTRL+X to exit and save it with the same name.
pcm.!default {
type asym
capture.pcm "mic"
playback.pcm "speaker" }
pcm.mic {
type plug
slave {
pcm "hw:1,0" } }
pcm.speaker {
type plug
slave {
pcm "hw:0,0" } }
Third. Now you’ll need to restart the Raspberry Pi 3 and test that it recognizes the microphone and speakers. On the desktop, there’s a file called “Check audio.” Double click it and it will search for the Voice HAT that we don’t have. So, we’ll need to change it. Type in a terminal the command sudo nano /home/pi/voice-recognizer-raspi/checkpoints/check_audio.py, and on the line that says VOICEHAT_ID = ‘googlevoicehat’, change it to VOICEHAT_ID = ‘bcm2835' which is the default sound on the Raspi, CTRL+X to exit and save it with the same name. Now, test the audio again, and everything should be up and running.
Fourth. If you have a button, connect it to GPIO 23. If you don’t have one, start the same service as in step 3 with a special command:
- python3 src/main.py -T clap
With this command, every time you clap, Google Assistant will be waiting for a question. Again, type CTRL+C to exit. Obviously, you can activate this service from any other device through SSH.
Conclusion
As you can see, having Google Assistant in your house is easier than it seems. All you need is a Raspberry Pi 3 and a couple of pieces of hardware. The only snag is that’s it’s only available in English right now. At the end of the year though, Google Assistant will also be available in Spanish, so for 2018, you can already be integrated into the Google Assistant SDK that we use with Raspi.
By default, Google Assistant voice service can answer almost any question you throw its way, but the fun doesn’t stop there. You can also use the power of the artificial intelligence to control a robot or ‘magic’ mirror with your voice. You could even do more complicated tasks with IFTTT if you felt like it. However, for that, you’ll have to make your own scripts.
Are you ready to take control of Google’s AI?




Hi, thanks for this guide. I made it all the way with my own speaker and mic. I have one question. I now only can start assistant with a clap, I want to use my voice like OK Google. How can I do this.
Thanks Robert