How to enable developer options on Android and unlock cool new features!
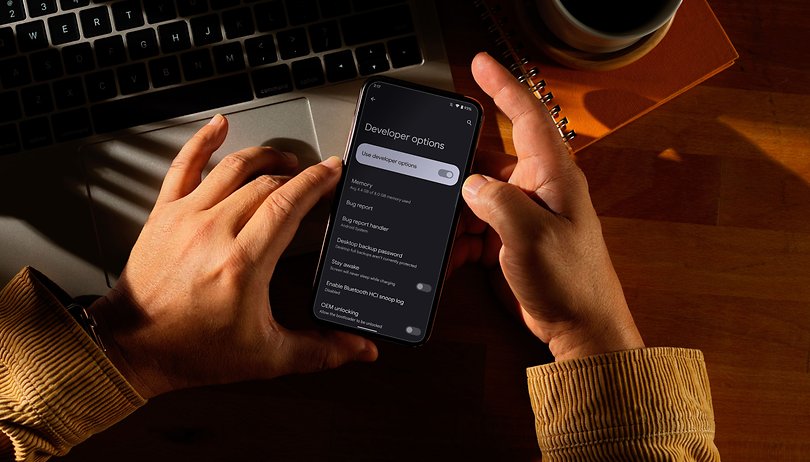

Wondering how to enable developer options on your Android phone? Looking for the developer options tips and tricks? Well, you have come to the right place! In this article, we attempt to demystify developer options for you and tell you why and how to use this cool feature on Android.
Jump to:
- What is the Developer options setting?
- How to enable the developer options
- Make your Android phone faster with these options
- Other Developer options available on Android
What is the Developer options setting?
The ‘Developer options’ setting is a hidden menu on Android smartphones. It is intended for use by Android developers who are into the business of developing and testing Android apps.
The various options within Developer options let developers check the functionality of their apps and how well it works on an actual Android device (instead of a simulated environment provided by an emulator). The eventual goal of the Developer options menu is to help developers configure the behavior of the phone to help them profile the performance of an in-development app and to make sure it is free of any major bugs before the final release.
Because the Developer options menu gives access to several advanced options that could potentially affect the stability and smooth functioning of the phone, the option is kept hidden from the average smartphone user.
We recommend that you do not enable the sections of the developer options that you do not fully understand. None of them are irreversible but their effects can be negative in the short term. If you leave a setting enabled and forget about it, your device might act in a way that consumes lots of battery life or data. Be careful.
However, there are several instances where some of the options within Developer options can help improve the overall user experience and offer the average user greater control over some aspects of the phone. Let’s see what those are. But before that, we need to know how to turn the Developer options feature on.
How to enable Developer options
The first step toward Developer options heaven is to enable them. Depending on the Android skin/Android version of your phone, the steps to do this may (slightly) change. Listed below are the steps on some of the more popular Android versions and skins.
How to enable Developer options on stock Android
The steps for Stock Android are applicable for devices from Google (Pixel series), Motorola, Nokia, and Sony.
- Open the Settings app.
- Tap on the About phone option.
- Tap the Build number option seven times in quick succession.
- You should receive a message saying "You are now a developer!".
- In case the developer options are already on, you may see a message that reads 'No need, you're already a developer.
- Now, go back to the Settings menu again.
- Scroll down and tap System.
- You should see Developer options here.
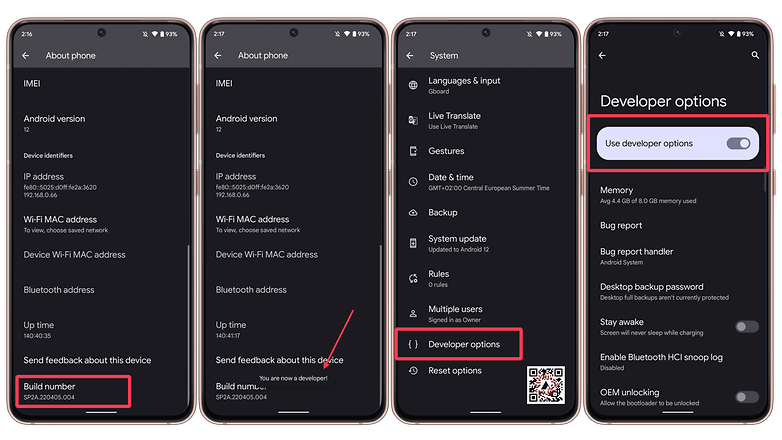
If you change your mind and want to disable the developer options, just open them in the settings and you'll see a simple on/off toggle in the upper right corner.
How to enable Developer options on Samsung devices
- On your Samsung smartphone, open Settings.
- Scroll to About phone or About device.
- Tap to open Software information.
- Tap the Build number option seven times in quick succession.
- You may be asked to enter your PIN or password to complete this process.
- Once the option is turned on, go to Settings and check if you have Developer options enabled by scrolling to the very bottom of the page.
How to enable Developer options on OnePlus devices
- On your OnePlus device, open Settings.
- Scroll down and tap About phone.
- Tap the Build number option seven times in quick succession.
- You should see a message that says 'You are now a developer!'
- Go back to the Settings menu and tap System.
- You should see the Developer options menu here.
How to enable Developer options in MIUI (Xiaomi/ Poco) devices
- On your phone running MIUI, open Settings.
- Tap About phone (Usually the first option within the settings menu).
- Tap the option called MIUI version seven times in a row until you see the message 'You are now a developer.
- Go back to Settings.
- Scroll down to Additional settings.
- Scroll down to Developer options.
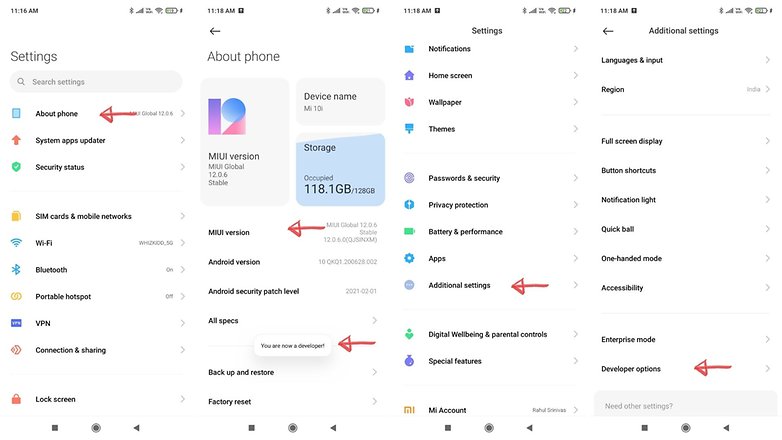
In case your smartphone brand isn't listed here, do note that the method to turn developer options on doesn't differ too much from the steps mentioned above.
Let us now take a look at the things that you can do after enabling developer mode on your smartphone.
Make your Android phone faster with these options
Let us, at the outset, make it clear that enabling Developer options is not recommended for everyone. While making changes to most settings within Developer options won't make your phone unusable, for many of you, the improvement in user experience gained from tweaking the options might not seem too significant to warrant the trouble you went through to enable it.
These options below can improve performance and fluidity in daily use:
Improve phone performance by limiting background apps
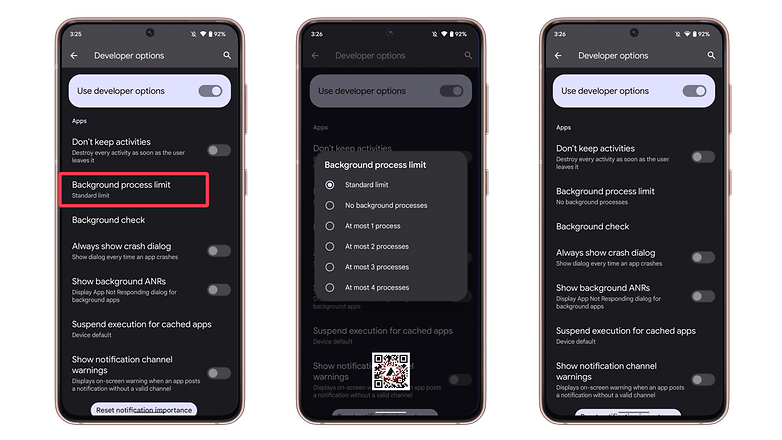
The Background process limit setting lets you select the number of apps that remain running in the background. The limit caps at four apps, but you can choose to have no background apps running at all if you wish.
With zero background processes, all of your applications will be terminated after use, which means whatever you're doing currently will receive Android's full attention and resources. This does mean, however, that switching apps will be slower. So, make use of this option in case you aren't really into multi-tasking.
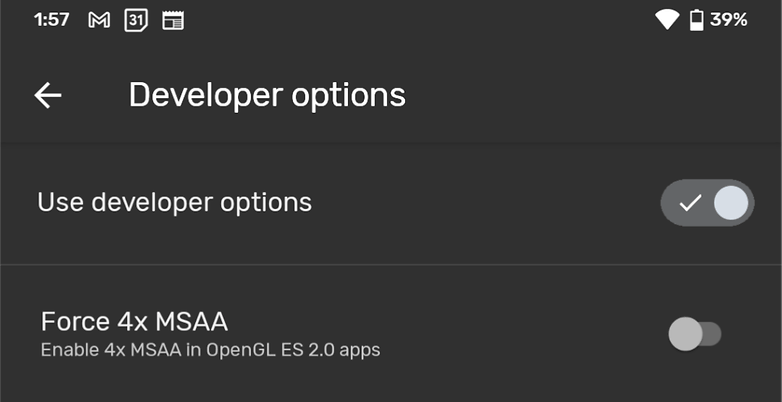
Force MSAA 4x (for better gaming graphics)
Enabling Force 4x MSAA improves the quality of graphics in games and OpenGL ES 2.0 applications. This requires more processing power and consumes the battery more quickly but if you're okay with that, say hello to smoother, less-jaggy graphics. This option can be used on devices that use lower-end SoCs.
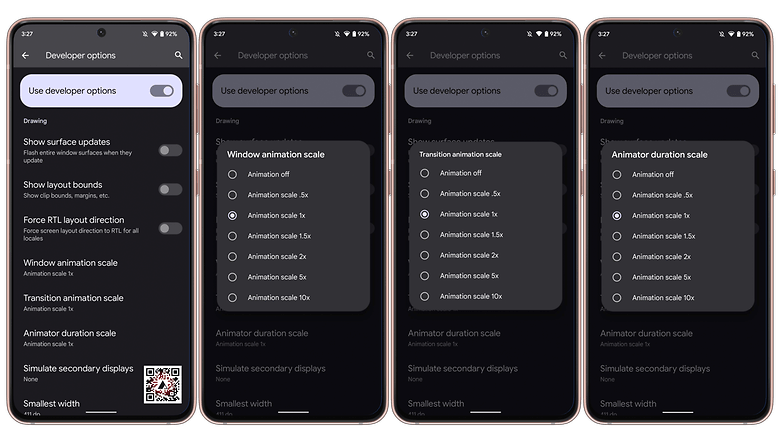
Set the speed of the system animations
Okay, this trick doesn't actually speed up your device, but it's a great way to trick your brain into thinking your device became faster.
Disable all of the device animations so that there is no transition effect when doing certain tasks (such as swiping between home screens). The outcome is a device that feels quicker and smoother. Try it.
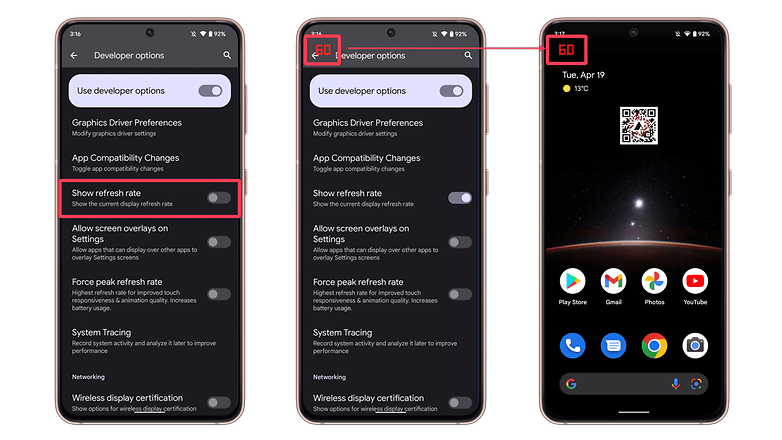
Display the frame rate (FPS) in real-time
If you feel like a game is not running at optimized settings, you can turn on the Show refresh rate option to display the current graphics frame rate in the smartphone. The option overlays a refresh rate counter on top of the screen, indicating the current FPS in games, similar to PC tools like Fraps or RivaTuner.
If the refresh rate counter is frequently dipping below 60 FPS in games, it might be wise to consider dropping the quality settings to enjoy smooth gameplay.
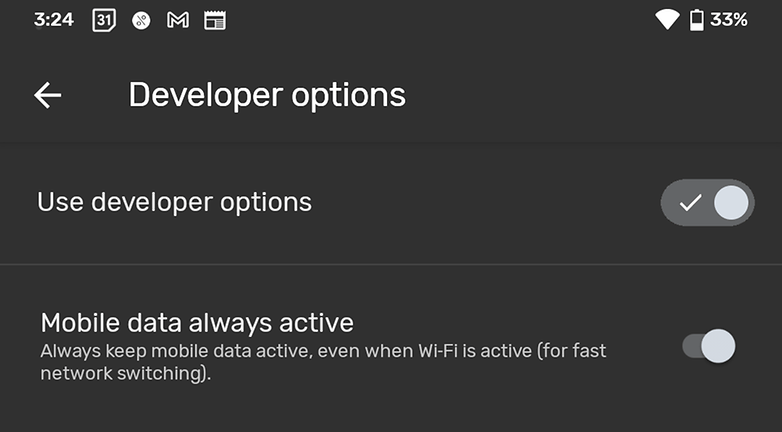
Keep mobile data always active (for faster internet, sort of)
This doesn't speed up your mobile data per se, but it does speed up how fast mobile data is adopted after a Wi-Fi signal is dropped. This setting can be a little dangerous if you don't have a huge amount of mobile data to spare because it means your device will be quicker to access it. Think twice before enabling it.
For example, your Wi-Fi signal may drop momentarily – as Wi-Fi signals tend to do – and your phone will immediately swap to mobile data, even if the Wi-Fi signal returns quickly.
If you never run over your mobile data limit, enable this setting and whenever you leave home or the office, you'll see your device switch to mobile data faster once you're out of reach of Wi-Fi.
Check running services
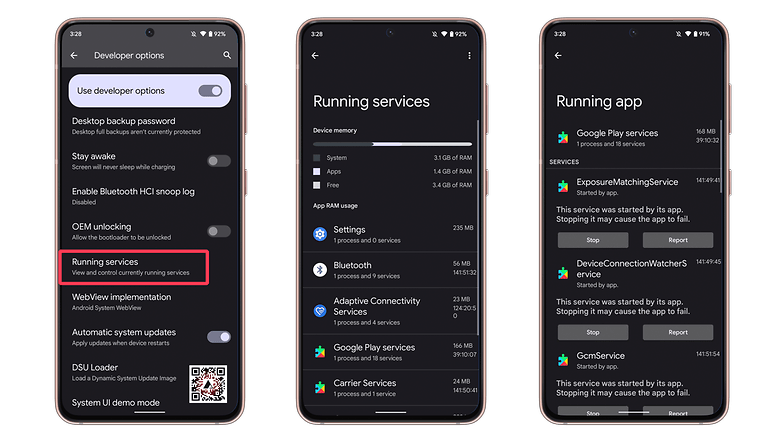
The Running services option is very similar to Task Manager on a Windows PC. It allows you to see what processes are currently running on your smartphone, how much RAM is in use, and what apps are using it. The listed applications are ordered by their memory usage.
When you tap on an app, you can also see the specific processes and services it's using. This allows you to kill RAM-hungry apps, which you are not actively using (don't do this with system apps). However, we don't recommend terminating a single app process without stopping the app itself, since it can cause crashes and functionality issues.
What else can you enable in Developer options on Android?
If you want to see what else you can do on your smartphone with Developer options enabled, here's a list.
Turn on USB Debugging
Perhaps the most commonly used option within Developer options is the USB debugging feature. While originally intended for developers to "debug" their apps, turning this option on is the basic requirement needed to activate root access and make way for the installation of custom ROMs. Enabling USB Debugging can also help with data recovery processes in instances wherein your smartphone screen isn't working.
We have a dedicated article on What is USB debugging and have explained how to enable it.
- Also read: How to use your broken smartphone from a PC
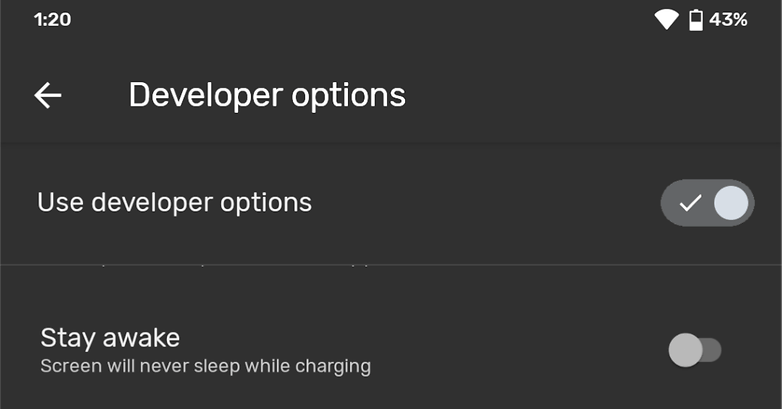
Stay awake (so your display stays on while charging)
I don't see many instances of this option being incredibly useful. But if you want to keep your display active when your device is charging, there is an option called Stay awake within Developer options. This, naturally, means your battery life is not threatened and if the display requires your frequent attention, it can be very useful. Once this option is enabled, you will need to use the physical power button to lock the phone while charging.
Mock location
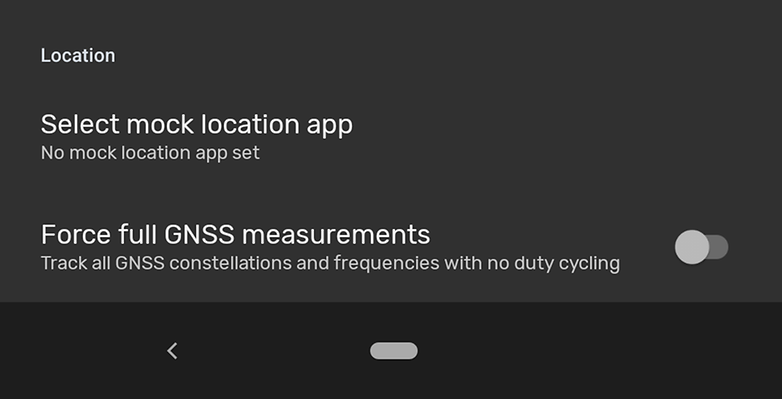
Tired of YouTube videos that are not available in your region? There are multiple apps on Google Play that allow you to spoof your location. Pick an app of your choice, then head to the developer options and find the Select mock location app option.
When tapped it should display the location spoof app you just installed. Select it and then open the app to choose where you want to be 'transported'. All that's left to do after is to enjoy your media without region locks. Note that this feature may not work on all phones and apps in 2021.
Change the default USB configuration
If you are forever plugging your phone in to transfer files or use USB tethering and find yourself waiting for the notification to pop up to change the function, there is another way to make this process a little easier. By changing the default USB configuration in the Developer Options, you can have your Android smartphone automatically activate the option which you use the most.
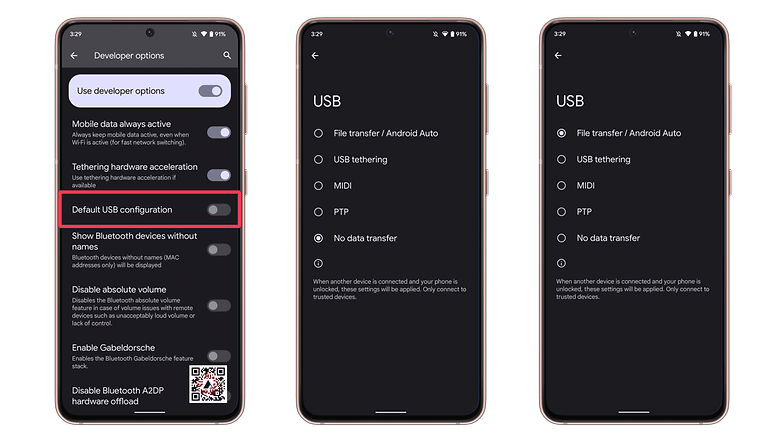
Pop down to Default USB configuration and tap it, as shown in the image above. From there you have several options. The stock default option, as on mine here, is No data transfer. This means that by plugging in your phone via USB, all you will do is charge it. As well as USB tethering and File transfer, you can choose MIDI (Musical Instrument Digital Interface) or PTP (Picture Transfer Protocol) to be your new default option.
What's your favorite setting in the developer options? Let us know in the comments section below!
This article was last updated in April 2022. Older comments have been retained.










I have a Samsung Galaxy S20 to get into developer options I need a pin. I don't have one and never used one for my phone. What do I do?
My UMX693 had Developer Options, now it doesn't, nor is the BuildNumber listed. Can I still activate the options
Sir, I am facing issue with my moto g7 phone. Phone crashes during video calls or during YouTube videos.
My phone randomly crashes during video calls or YouTube videos.
is this allow to use in huawei honor 10 lite???
-
Admin
Dec 19, 2019 Link to commentgreat article. very detailed and useful. Thanks
I found this useful as a refresher.
Hi sir/ Madam..
I am using Sony WH-CH500 wireless headphone from last 6 months and there is one problem I'm facing these days is my headphone doesn't say "Bluetooth connected" or "Bluetooth Disconnected" even if it's connected or disconnected.kindly give me trick so that my headphone will say "Bluetooth Disconnected or connected " when it's connected or disconnected..
Hi,
I'm having trouble with this. It already says I'm a developer however the developers option is not showing up in my settings. I'm using a Huawei Nova 3i. Please help. Thank you
thankyou sir,,,,
thankyou for these tips sir
Thanks for the rundown, I missed it first time around. I much prefer using an app like Greenify to control specific apps, as opposed to trying to limit the number of processes in D Options not knowing what's being affected. I've found a few screen transitions jam with the three animation settings at 0.0, but no problems if that tick of time is set at 0.5. I keep thinking split screen in a new Nougat tablet might offer new joys and productivity, but haven't got into it yet.
Best ones are the animations and the force 4x. Set animations all to off and enable 4x. Makes a huge difference!
That's a useful post for me thanks! for sharing these insights
I don't play with developer option. I only turn it on when I want to change my phone location which I will later turn it off. The bottom line is be careful with that setting on your phone because it's not for novice.
Developers options is no joke, you have to be careful in what you do here. Limiting background apps will decrease your phones multitasking ability, animations adjustment can be tricky, and done wrong will make things like unexpected responses, jitter, and can outpace the display, if adjusted foolishly(you really have to find the right setting for your display). This article is kinda generic, and just touches on things you shouldn't touch(alternately, even the things in the article that can be adjusted wrong with consequences). I could see someone messing with the background processing limit, which no one knows what the standard limit is(the best answer seems to be mfgr related to memory), and turning on "don't keep activities", at the same time(I'd rather use a app like l speed and adjust the min free settings, but that's really risky, ya gotta know what your phone's memory can handle) fun! There should be more caution in this post, and there should be a whole paragraph on reading up on what these setting mean. I've been modding my phones since 2009, and yes, I had to learn the hard way(never lost a phone though), from gingerbread to nougat( no custom Oreo rom for my phone yet). Oh, and one more thing, rookies should not touch development tools, until they get some experience, and education in what they are about, even I hardly ever go there, and I know what's up with that! Be careful investigate/read.
Perfectly worded most people just say don't touch it but you instead say educate yourself before diving in . I miss the gingerbread days I started with a froyo all the way to my Galaxy with it's Oreo. My daily driver is my Nvidia shield k1 with nougat which I enjoy but for something from Nvidia and the price is very disappointing. Shield tv pro is really cool and good to have minus the fact the k1 tablet has gamepad mapping but the shield tv doesn't but sideloaded emulators work pretty well even psx and ppsspp like a dream. So guess all's not too bad but the tablet was a let down with constant dragging.
How do I disable the developer option
If you change your mind and want to disable the developer options, just open them in the settings and you'll see a simple on/off toggle in the upper right corner.
Thank you nice stuff , I have used some of these before but there's so many. Is there a complete run down on what all of them do some where. If not to use but learn a little something and better understand what not to touch.