How to add a HomeKit Accessory using your iPhone
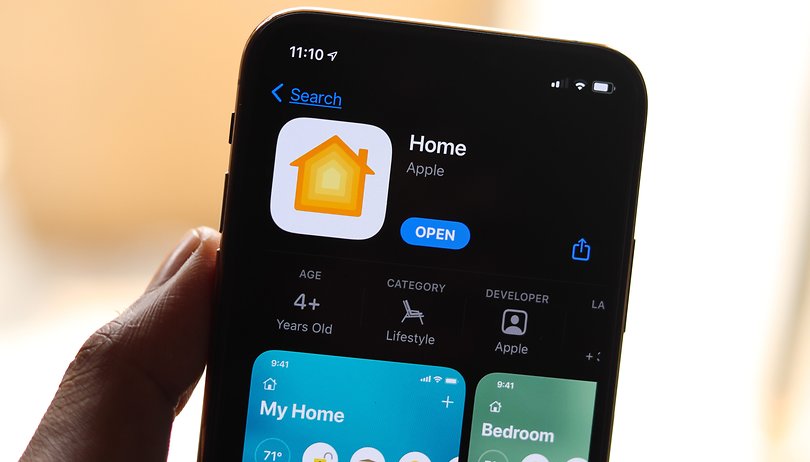

If you are rooted in the Apple ecosystem, then you should know and even use the Home app to integrate your smart devices at home. To do so, the first step is to add an accessory to HomeKit using your iPhone.
What is HomeKit?
In response to Amazon Alexa and Google Home, Apple created the HomeKit platform to manage all the smart devices you have at home. Although the company landed late in the smart homes universe, the Home app is quite comprehensive and offers a number of automation options.
Today, an increasing number of smart devices are compatible with Apple's HomeKit platform, such as lighting systems, security cameras, smart speakers, doorbells, thermostats, smart plugs, and more. If you own a smart device that works with HomeKit, the first step is to add the accessory to HomeKit using your iPhone or iPad.
Here is how to add a HomeKit Accessory using your iPhone
Being accustomed to Amazon's and Google's smart hubs has caused me to put off using HomeKit. However, Apple's smart home solution is very convenient for iPhone users, so the transition was inevitable.
Using your phone, make sure the Home app is installed to start integrating the smart accessories. If not, you can download the Home app from the App Store. Once that is done, make sure your smart devices are connected and nearby. Then simply follow these steps:
- Open the Home app on your iPhone (or iPad).
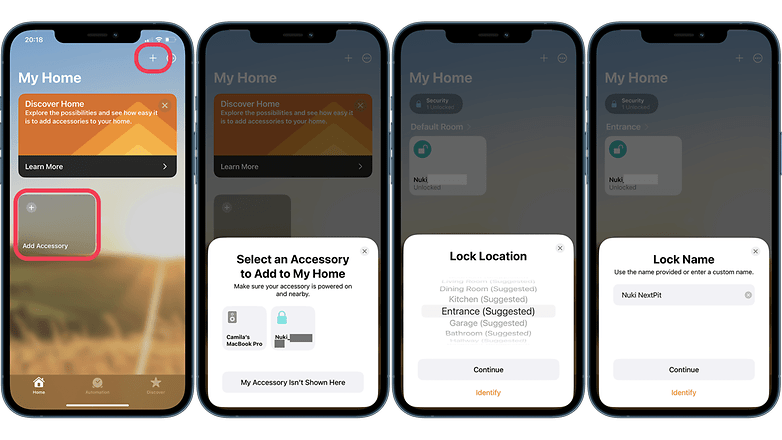
- In My Home, click the Add Accessory widget (if you've never set up a smart device before) or the "+" icon at the top right of the screen and tap Add Accessory.
- From the context menu, select the accessory to add to My Home.
- Here, adding the accessory can be done via QR code reader or NFC. To do this, look for the HomeKit setup code on the accessory, in the installation manual or in the packaging box, and use the iPhone camera for data entry. Alternatively, you can also add the configuration code manually by clicking on More options.
- Once scanned, the accessory will be connected to My Home-this may take a few minutes.
- A new context menu will appear on the screen with the location configuration. Select the environment where the accessory is located and click Continue.
- Add a custom name for the accessory (or keep the default) and click Continue.
- Now your accessory has been added to the Home app and can be controlled from your iPhone, iPad, HomePod, and Apple TV (4th generation or later).
Now that your smart device is added to HomeKit, you can check relevant device information such as battery level and firmware version, control the device remotely, and most importantly, automate accessories to do what you want, when you want.
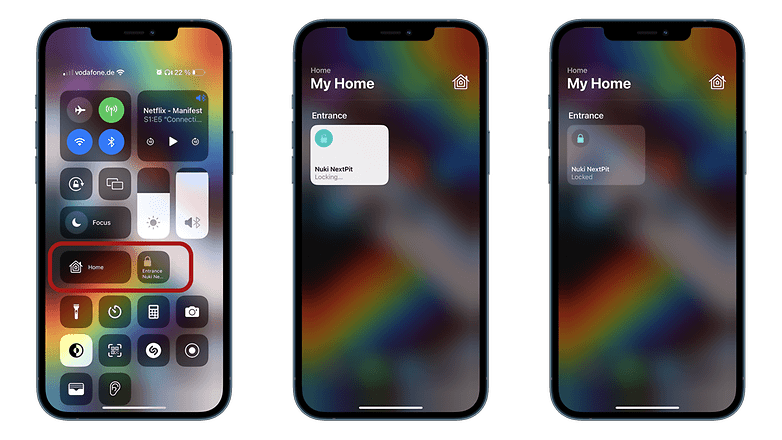
In addition to the Home app, you can also quickly access your accessories from the control center of your iPhone or your Apple Watch.
So, is HomeKit the platform you use to manage the smart devices you have at home? Or do you prefer Amazon Alexa or Google Home?
