How to get Android 5.0.2 on Nexus 7 (2013) and Nexus 10 right now

About freaking time. The Android 5.0.2 Lollipop update for the Nexus 7 (2013) and Nexus 10 is on its way. Well, the factory images have been posted on the Google Developer's site, so you don't need to wait for the over-the-air update to arrive anymore. Here's how to flash those images on your Nexus 7 (2013, Wi-Fi) or Nexus 10.
- Nexus 7 (2013) Android update: when will I get it?
- Android 5.0.2 Android update: when will my phone get it?
Warning: Factory images are a clean version of Android – just as it comes from Google – so flashing a factory image comes with the loss of your data. Make sure you back up all of your apps and data before flashing the factory image and restore afterward.
Prerequisites
First up, you need to download a few things:
ADB Tools and drivers (download from AndroidPIT)
Android 5.0.2 factory image (LRX22G) for either:
- Nexus 7 (2013) Wi-Fi only version
- Nexus 10
Extract these files to your PC in the ADB Tools folder.

Unlock your bootloader if it isn't already (this will wipe your data)
1. Turn off your Nexus.
2. Press and hold Volume Down and Power to enter Fastboot Mode.
3. Connect your Nexus to your computer with a USB cable.
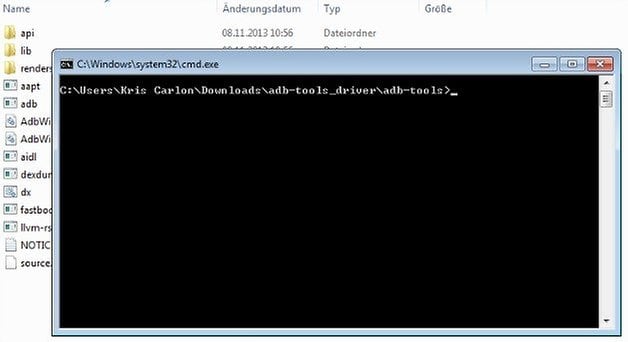
4. Go into the ADB Tools folder on your PC. In a blank space in the window, press and hold Shift and right click the mouse. Select ''Open Command Window Here''.
5. Once the command window is open, enter the following command:
fastboot oem unlock
6. Press the Volume Up button on your device to accept the command and press Power to confirm. The bootloader will now be unlocked, and all data will be lost.
How to flash Android 5.0.2 factory image
Regardless which Nexus you're using, the process is the same.
1. Turn off your Nexus and restart it in Fastboot Mode by pressing and holding Power and Volume Down.
2. Connect your Nexus to your computer with a USB cable.
3. Navigate to the ADB tools folder and find the extracted file you downloaded before called flash-all.bat
4. Your Nexus will reboot and install the Android 5.0.2 update.

Troubleshooting
1. If your Nexus doesn't reboot normally or gets stuck in a bootloop, turn it off once again and re-enter Fastboot Mode by pressing and holding Power and Volume Down.
2. Use the volume buttons to highlight Recovery Mode and press the Power button to confirm.
3. Use the volume buttons to highlight Wipe Cache Partition and press Power to confirm.
4. Scroll down to wipe data/factory reset and press Power to confirm.
5. Reboot your Nexus and you should restart as normal, running a clean version of Android 5.0.2. Restore your apps and data and you're golden.
What are your thoughts on Android 5.0.2? Found any bugs?






I Flashed This On A IRULU X7 By Changing The Following Line's In The Build.prop
>ro.config.low_ram=true
>ro.config.ram_allocation=5000 [500MB]
Both my wife upgraded our Nexus 7s to 5.0.2. We have found three issues. It forces you to amalgamate emails from other email providers into GMAIL. Neither of us like the new keyboard. However more importantly the performance of both is now dire. It takes ages to do anything.
wow i really thankful for this article