How to unlock the Nexus 6P bootloader
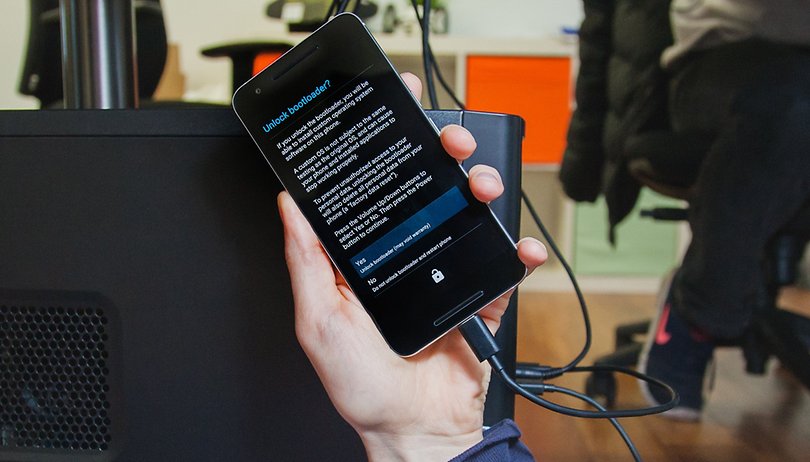

One of the first things I do with any new phone is unlock the bootloader. An unlocked bootloader lets you flash custom firmware or add a custom recovery, among other changes. The process wipes your data, so doing to your phone as soon as it's out of the box makes sense. Today I'll show you the procedure for unlocking the Nexus 6P bootloader on Android Marshmallow.
- Nexus 6P battery tips
- Nexus 6P Android update news
Prerequisites
Before we get started on the actual bootloader unlocking process, you need to do a couple of things on your phone and computer first. Remember, unlocking your bootloader wipes your device data, so make sure you have backed up any important information before you proceed. If you need a guide, follow our tutorial on how to back up Android.
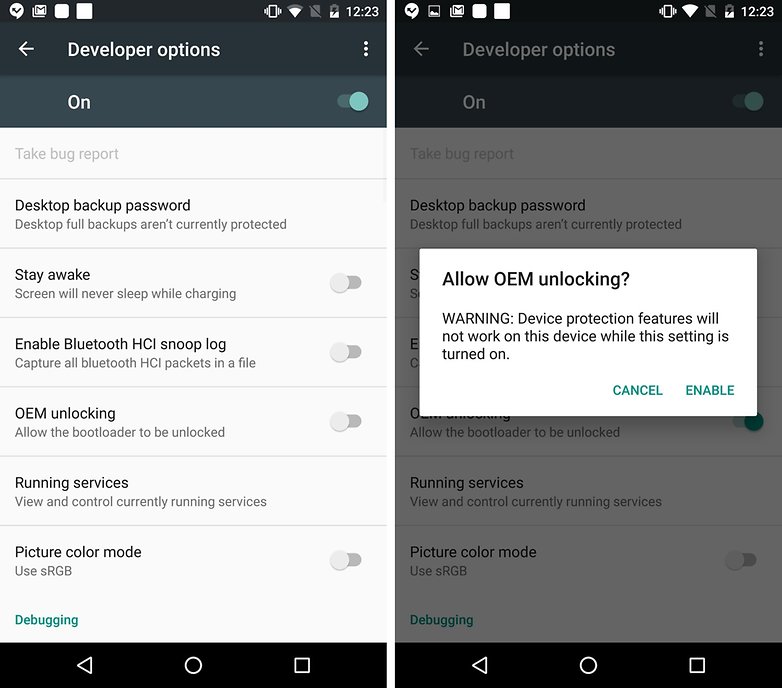
1. On your Nexus 6P, go to Settings > About phone and tap Build number seven times until you see the message that Developer options has been enabled. Back up to Settings and you'll see it at the bottom of the list.
2. Go to Settings > Developer options > OEM unlocking and flip the switch.
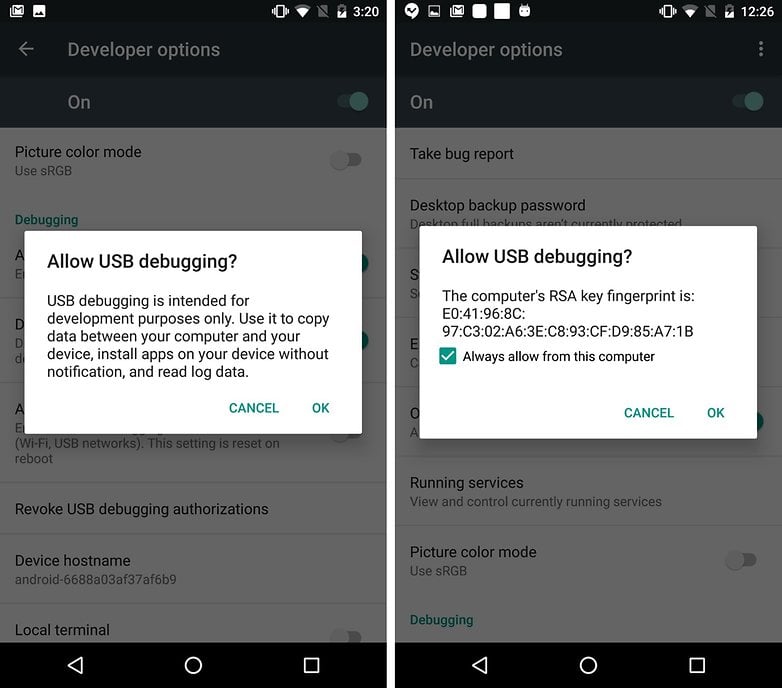
3. In Developer options you should also flip the switch for USB Debugging.
4. Go to Settings > Security and make sure your lock screen is either set to swipe or none. This removes your security settings from your device, including any start-up pattern or PIN.
5. Connect your Nexus 6P to your computer and tap OK when the RSA key prompt appears asking if you want to allow USB Debugging from your computer.
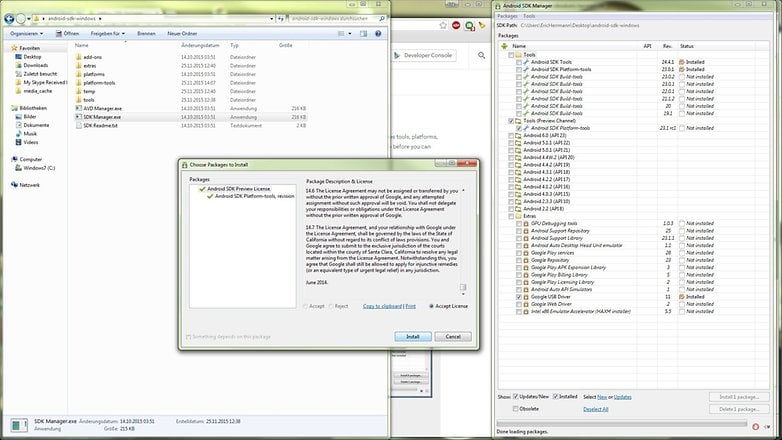
6. On your computer, download Platform Tools from the Android SDK. Follow the link and download the package for your computer.
7. Once downloaded, launch the .exe (and install the JDK if prompted).
8. In the SDK Manager you'll be asked to choose what packages to install. Select Android SDK Platform Tools and Google USB Driver only, ignore the rest.
9. Install the two packages.
How to unlock the Nexus 6P bootloader
1. Turn off your Nexus 6P.
2. Press and hold Power and Volume Down until you see the bootloader screen (also known as Fastboot mode).
3. Connect your Nexus 6P to your computer with the included USB Type-C to Type-A cable.
4. Navigate to the Platform Tools folder, hold Shift and right-click your mouse. Select Open command window here.
5. In the command window, you can check the connection to your Nexus 6P by typing: fastboot devices
6. You should see your device's serial number in the command window. If you don't, double check to make sure you have correctly installed the USB drivers. You can also install the drivers again while in Fastboot (see below this tutorial for further instructions).
7. In the command window, type: fastboot flashing unlock
8. Your Nexus 6P will flash up a screen asking if you want to unlock the bootloader. Press the Power button to confirm the process but remember, doing so will factory reset your phone and wipe your data.
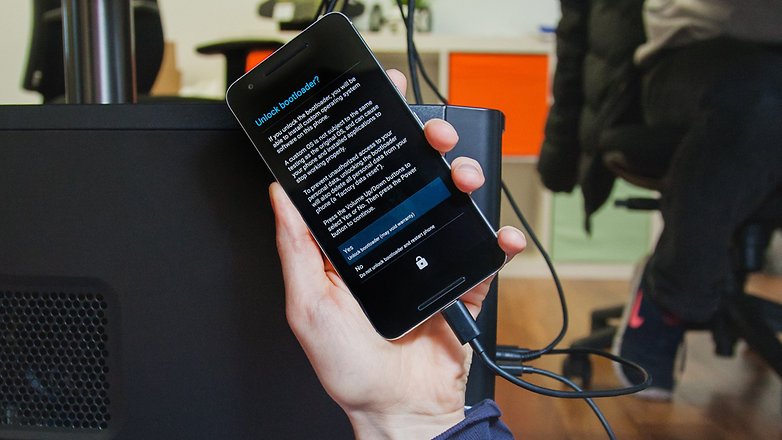
9. Once you've agreed, your Nexus 6P will factory reset with an unlocked bootloader. You're done, you can now either reboot or flash a custom recovery while you're here – see below for those instructions. If not, continue with the next step.)
10. Finally, type: fastboot reboot
11. Set your phone back up from scratch and restore any data you saved earlier.
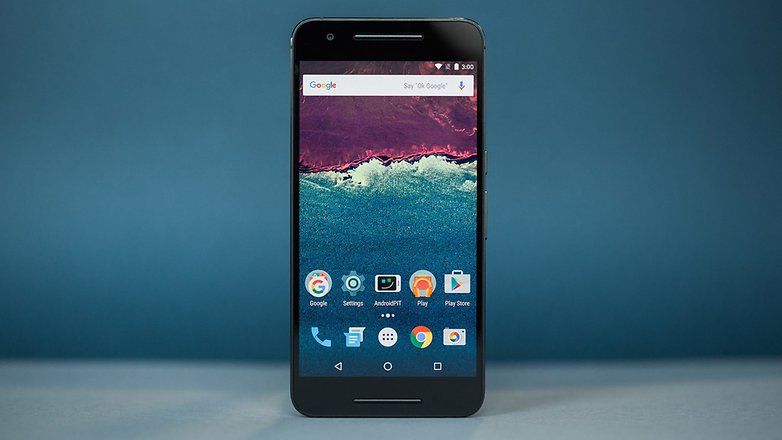
12. Once the process has completed you can reboot your Nexus 6P. You'll see a warning screen letting you know that your device is unlocked and that it can't be checked for corruption. This is fine (you'll see it every time you reboot until you re-lock your bootloader, which shouldn't be done unless you return your Nexus 6P to stock condition).
How to flash a custom recovery
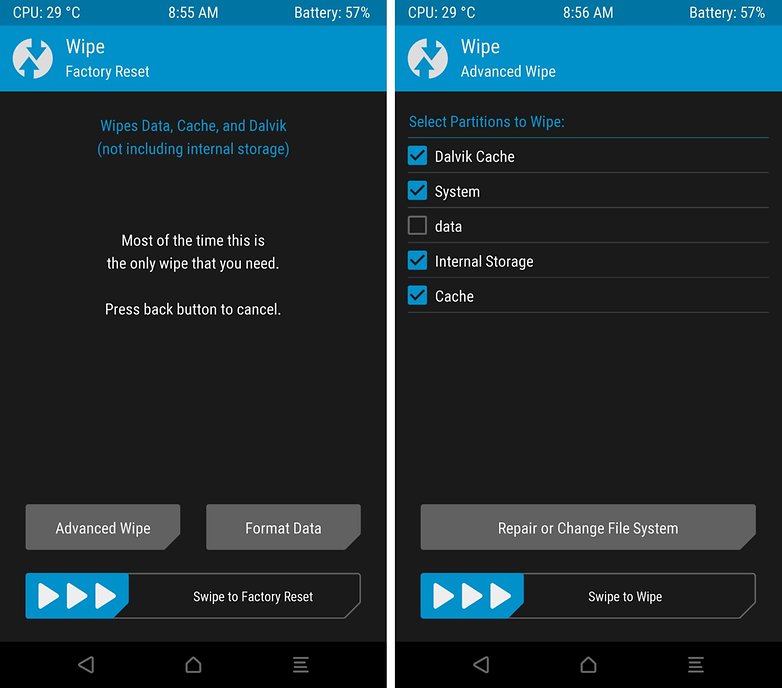
1. If you want to flash a custom recovery while you're still in Fastboot, you can. It only takes a moment and saves time later.
2. On your computer, download the latest TWRP and put it in the Platform tools folder.
3. In the command window, type: fastboot flash recovery twrp-<version number>-angler.img (for example, the command for the particular TWRP version I'm flashing is fastboot flash recovery twrp-2.8.7.2-angler.img)
4. Once that has completed, type: fastboot reboot
What to do if your Nexus 6P isn't recognized
If you don't see your serial number when you type fastboot devices into the command window, you can install the drivers again while in Fastboot mode. On your computer, open Device Manager and under Other devices (or Portable devices), you'll see your Nexus 6P.
Right click Nexus 6P and select Update driver. Browse to the location of the Google USB drivers on your computer. Type fastboot devices into the command window again and you should now see your serial number.
What's the first thing you're going to do with an unlocked bootloader? Tell us your plans in the comments.






I've got the same 'connect USB data cable'issue here.
Help
I did exactly as mentioned but the Nexus 6P shows "connect usb data cable" in bootloader mode. The funny thing is, fastboot devices shows my device sl no but fastboot oem unlock fails. Nexus 6 does not have any issues though. I am on windows 10 pro. Any solution?
having the same problem. Were you able to find the solution? Please let me know
Not yet. Hopefully soon. This is driving me nuts!!!!! ?
Can you come to Hangouts
?
Yeah. abhinavsg at gmail
sent