Davinci Resolve app review: Professional video editing on the iPad
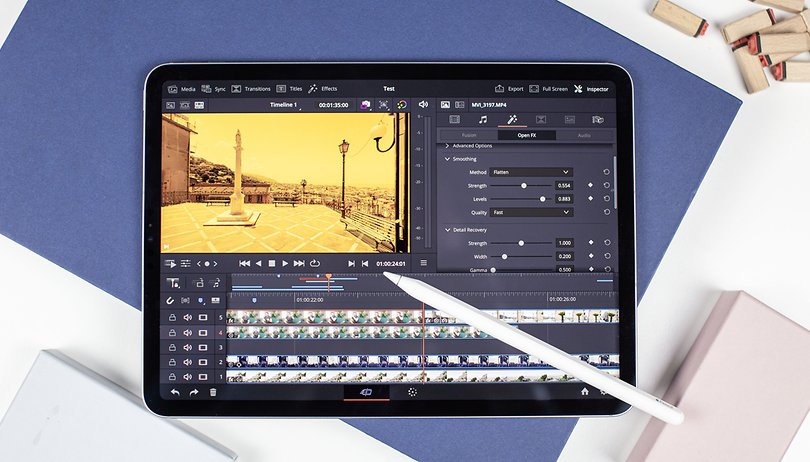

Blackmagic's DaVinci Resolve has always been one of the recommendations among video editing enthusiasts. The basic version of the free video editing software offers a range of functions that can hold its own against the likes of Adobe Premiere, Final Cut, and others. Now that DaVinci Resolve is coming to the iPad. NextPit reviewed the video editing program and discovered that it lacks only one major feature on the tablet compared to the desktop version.
Summary and pricing
If you're not familiar with DaVinci Resolve, the video editing software from camera and video equipment manufacturer Blackmagic is an extremely powerful professional application for Windows, macOS, and Linux that's free for the basic version. It is also the industry standard, especially when it comes to color correction. The upgrade to the professional version called DaVinci Resolve Studio is still comparatively cheap with a one-time payment of $295.
For the Apple iPad there is also a free basic version with the known limitations of the desktop version. Upgrading to the Studio version on the iPad costs just $95, but the tablet version lacks the compositing module that lets you create complex animations, 3D renderings, and more.
Here is a summary of what the main advantages of the Studio version are:
- Maximum output resolution: You get up to 32K resolution in the Studio version instead of "only" 4K at 3820 x 2160 pixels at 60 fps.
- Noise reduction: If you film a lot in low light conditions, the noise reduction in the Studio version is worth its weight in gold.
- Lens correction: Do you often film at very wide angles, for example? Then get rid of the fisheye effect with the lens correction feature.
- More effects: The Studio version offers features like film grain, anti-flicker filters, and the removal of distracting objects.
- Neural Engine: AI effects like Magic Mask, smart acceleration of clips, or AI upscaling are only available in the paid version.
- Color correction: If you work with HDR videos, DaVinci Resolve Studio offers many additional helpful features.
The bottom line is, DaVinci Resolve on the iPad is an incredibly versatile and incredibly powerful video editing software, even in the basic version. At the equivalent of less than $100, the Pro version is also a bargain. Using it occasionally feels somewhat mouse-oriented, but it succeeds without any problems after a bit of familiarization.
Before you rush into the Apple App Store and look for DaVinci Resolve: At the time this article was published, DaVinci Resolve remained unavailable in the Apple App Store. According to Blackmagic, the launch is still scheduled for December, but that leaves a relatively small window of opportunity.
Note: We reviewed the beta version of DaVinci Resolve on the iPad. Individual functions may still differ in the final version.
DaVinci Resolve Interface
At first glance, the interface of DaVinci Resolve is overwhelming. This is just as true on the 32-inch monitor as it is on the 11-inch iPad Pro (2022), which we used to review the video editing program. With a bit of patience, however, you can find your way around and have a tool at your disposal that can handle everything from private Christmas videos to Netflix productions.
The very first thing you have to do, of course, is to create a project. This can be done via the start screen. You then land on the three-part start screen with—I counted it for fun—a whopping 66 different icons, most of which have no labels, but some of which can be folded out to reveal further options.
Basically, DaVinci Resolve has three main icon areas for switching between different video editing modes. In the center at the bottom of the screen, you'll find the first toggle between the two basic working environments for video editing and color correction.
- Video editing is roughly about putting the individual clips in your video project in the right order, trimming them, placing them next to each other and on top of each other, and adding transitions and effects.
- When it comes to color correction, you have the option of not only fixing white balance, skin tones, and other details but also creating smart masks that apply different color effects only to individual parts of the image.
Both working environments look completely different. The desktop version of DaVinci Resolve offers even more options here, including the compositing environment Fusions as well as the audio editing Fairlight. In an interview with NextPit, a product manager from Blackmagic said that DaVinci Resolve on the iPad could theoretically also do Fusion. However, the usability is not yet ready, which is why the compositing environment is still missing for the launch of DaVinci Resolve on the iPad.
The other two toggles are located at the top left and top right of the screen. Depending on the context, there are three to five buttons here that you can use to access different tools. The tools then move to the right or left of the screen, depending on which side the button is on. Once you've got your bearings here, you'll find the desired option in a flash.
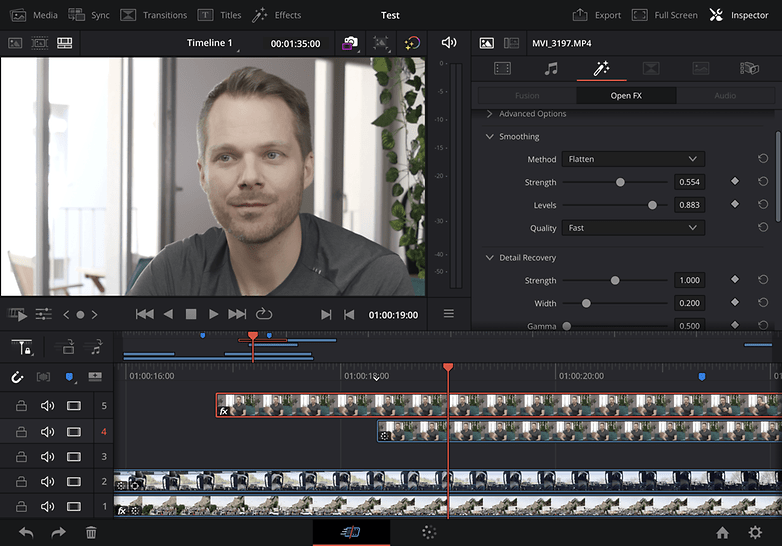
In video editing mode, for instance, you can call up the "Add Media", "Synchronize Media", "Transitions", "Titles" and "Effects" dialog boxes onto the screen from the left. On the right, you'll find Export, Full Screen, and - most importantly - the Inspector, which lets you edit numerous properties and effects of the currently selected clip.
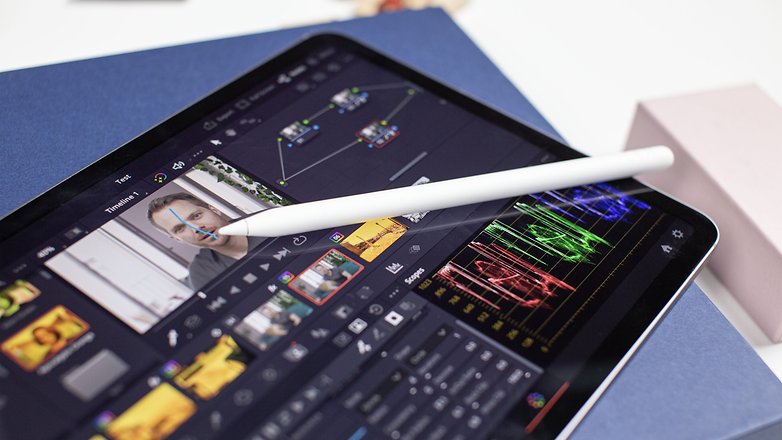
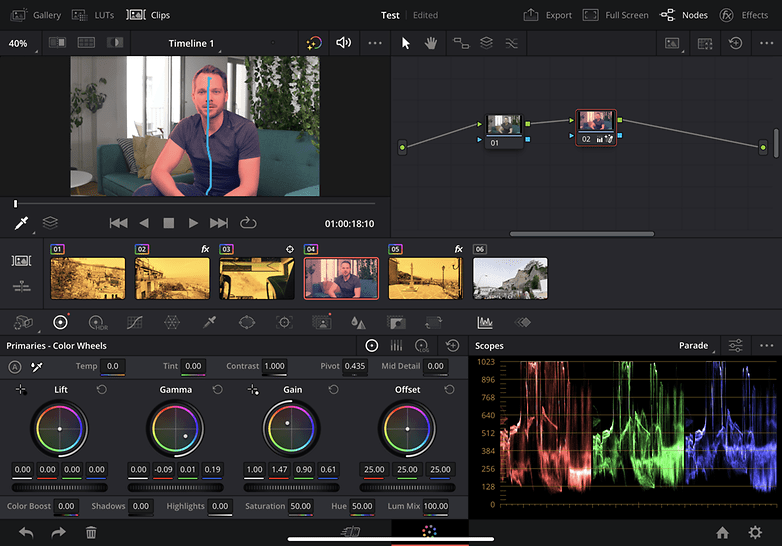
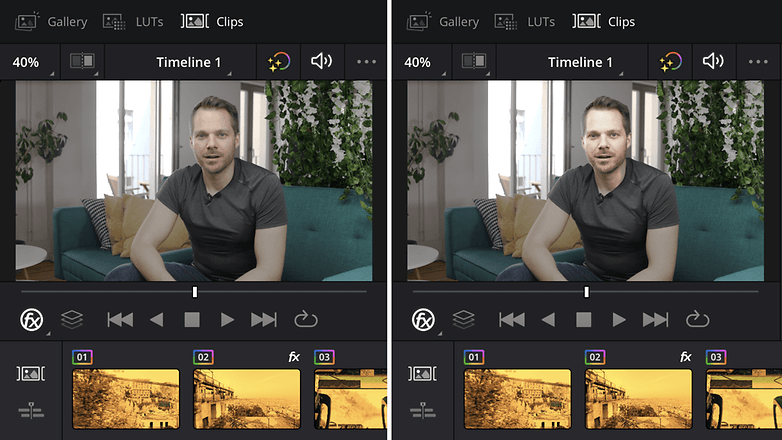
In Color Correction mode, on the other hand, the selection is a bit clearer. On the left, you have the choice between "Gallery", "LUTs" and "Clips", for reference screenshots, rough color adjustments, and for navigating between the individual clips. On the right, you will again find the two options "Export" and "Fullscreen" as well as the "Effects" dialog from the video editing mode. What is new and very important here, however, is the "Nodes" option, with which you can link different effects.
Basically, the interface is as clear as it can be for such a powerful video editing program. Even though Blackmagic says DaVinci Resolve is optimized for the 12.9-inch iPad, there were absolutely no display problems or errors on my 11-inch review unit. But even more clearly, additional viewing space is always more convenient for image and video editing tasks.
In some places, it's noticeable that the iPad is essentially running the desktop version of DaVinci Resolve here. For instance, when moving a video clip from the Media Library to the Timeline, you first have to tap to select it, and then you can tap and hold again plus drag to place it. If you drag your finger through the media collection without tapping the clip first, you will mark several clicks there with a frame.
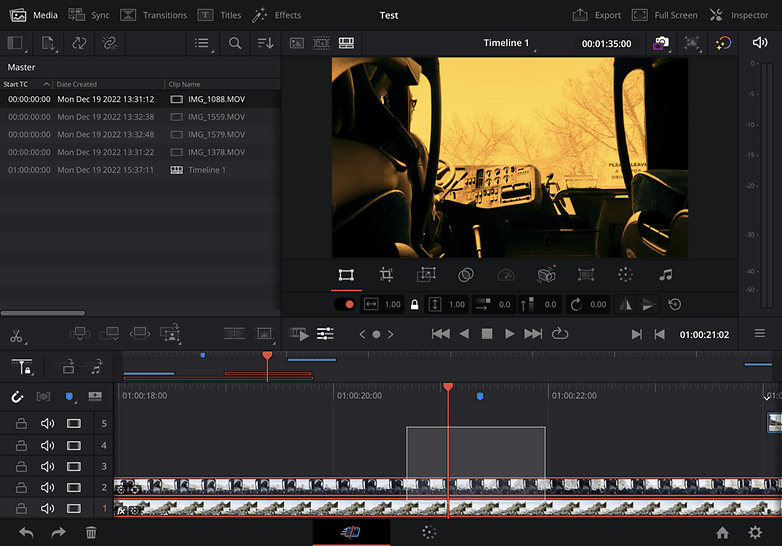
Things are different in the Timeline itself: Here, you can tap and hold plus drag to move clips directly - without marking them first. All in all, this is probably the best solution for using DaVinci Resolve completely via touchscreen. However, it always makes for a somewhat awkward operation, especially at the beginning.
If you really want to do a lot of editing work on the iPad with DaVinci Resolve, you should think about getting a hardware controller. The "small" DaVinci Resolve Speed Editor costs a hefty $395, but a license for the DaVinci Resolve Studio worth about $300 is included in the price—and you can also use the Studio version on the iPad. I was able to try out the controller for a few minutes at an Apple event and was really smitten by it.
DaVinci Resolve on the iPad: Video editing
If you've ever worked with a non-linear video editing program like Sony Vegas or Adobe Premiere, you'll quickly find your way around DaVinci Resolve. At the bottom of the screen, there's a timeline where you can arrange your clips in sequence and on top of each other. You can assign your own effects to each individual clip. These range from scaling and cropping to blurring and graphic overlays to beauty effects and background removal. Since Fusion is not (yet) available in the iPad version of DaVinci Resolve, the corresponding tab in the Effects panel is unfortunately simply grayed out.
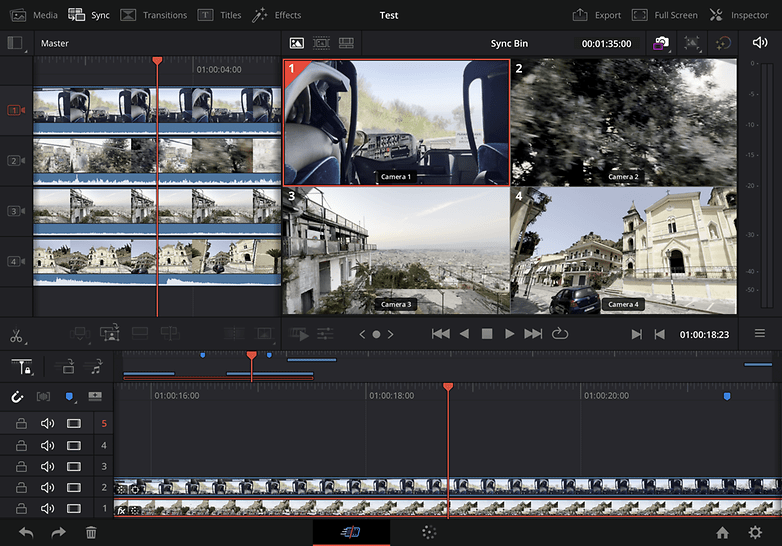
What else is there? Crossfades ensure that your clips blend smoothly into one another. Layer modes let you blend multiple layers on top of each other in a variety of ways—from color matching to double exposure and more. You also have a few rudimentary audio tools at your disposal, such as changing the volume and balance of clips, adjusting equalizer and pitch, or isolating voices from background noise. One thing is for sure: The Fairlight audio environment on the desktop version of DaVinci Resolve can do more.
The bottom line is that there really are an incredible number of options, and you'll need some time to feel at home in DaVinci Resolve. But it's worth the time—and once you've invested a few hours, you won't want to miss out on using the software in the future. Whether it's the free version or the Studio version, there's simply no other video editing program with anything close to the same feature set. The same applies for the iPad as well as the desktop versions, by the way.
DaVinci Resolve on the iPad: Color correction
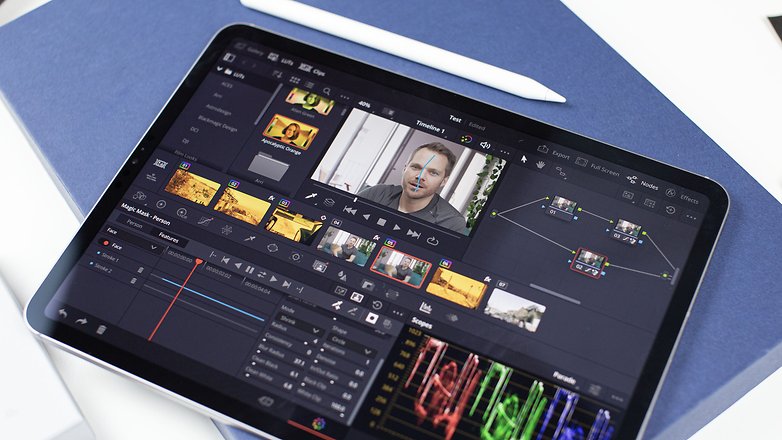
DaVinci Resolve evolved from simple color grading which is where the software's true strength lies, to what it is today. The major difference compared to most other video software is that DaVinci Resolve relies on nodes instead of layers. If you want to work with DaVinci Resolve, you have to get used to nodes and their different types.
The easiest to understand are serial nodes. These essentially work like layers in Photoshop. Input comes from the left, the node does something with that input and passes the result to the right—either to the next node or to the output, the final image. For each of these nodes, you can now define your own effects, from vignettes to secondary color corrections to elaborate effects based on automatically tracked shots. But more on that in a moment.
The main advantage of nodes over layers is that they also work in parallel with parallel nodes. This means that you can work with several layer stacks at the same time and then combine them into one image. This has the great advantage that you always have the original image available for different effects. Last but not least, there are layer nodes, with which you do not mix nodes equally as with parallel nodes, but prioritize them from bottom to top, as with Photoshop layers.
Yes, the nodes system is really unfamiliar and annoying at first. But it is much more powerful than the layers and adjustment layers you know from Photoshop, Premiere, and other similar programs.
What else is there to know? In the Gallery, you'll find screenshots of your video project, which serve as a guide for the right look. The LUTs, short for Look-Up Tables, are basically very powerful color effects, but are also used, for example, to convert LOG video to linear display. With the "Clips" dialog you can quickly and easily bring different clips onto the screen to perform color correction. By the way, you can also import LUTs, for example from camera manufacturers or stock websites that offer them.
- Also interesting: All iPads from Apple compared
Conclusion
DaVinci Resolve on the iPad impressively demonstrated the progress Apple has made with the switch to its own chip architecture - and what is possible with tablets in early 2023. In terms of video editing and color grading, DaVinci Resolve in the iPad version offers almost the same range of functions as on the desktop, and that's really impressive.
The bottom line is, Blackmagic DaVinci Resolve offers an incredible number of features for editing and stitching videos, and shines in color correction and color grading. In view of what's on offer, both the free version and the studio version, which costs just under $100, are absolute bargains. Those who want to work ambitiously or professionally with DaVinci Resolve on the iPad should consider the DaVinci Resolve Speed Editor, which presents the most important functions in the form of physical controls.
Just as impressive as the range of functions was the performance of Blackmagic DaVinci Resolve on the iPad Pro (2022) that is powered by the M2 processor in the review. Our small test projects with up to 4K material always run smoothly, and even with complex tracking functions running through in a few seconds in the test. The timeline, as long as you do not overload the clips with effects, also runs in real-time. This makes video editing on the tablet fun.

