How to use CrossOver to use Linux to use Windows on Chrome OS ?


What a mess! However, if you are interested in using Windows software on ChromeOS, this app will make your life much easier. Imagine being able to use your company's management software, certainly not available outside of the Microsoft world, on your trusted Chromebook in complete safety, or professional programs such as Photoshop!
Stop, stop, stop! Before you run straight to the comments section, I'm well aware that for most of the programs that users use every day there are free, web, open source and/or multiplatform alternatives. However, for some software, this is not the case. That's where CodeWeavers' CrossOver comes in.
I tried CrossOver on a Google Pixelbook with an Intel Core i5 CPU and 8GB of RAM. However, it is compatible with all Chromebooks with Intel CPUs, at least 2GB of RAM, and 200MB of free space (plus the one space needed to install the various programs). You will also have to have access to the Google Play Store.

Shortcuts:
- How does CrossOver work?
- Installing CrossOver on Chrome OS
- Installing a known program
- Installing an unknown program
- Installing additional libraries and dependencies
How does CrossOver work?
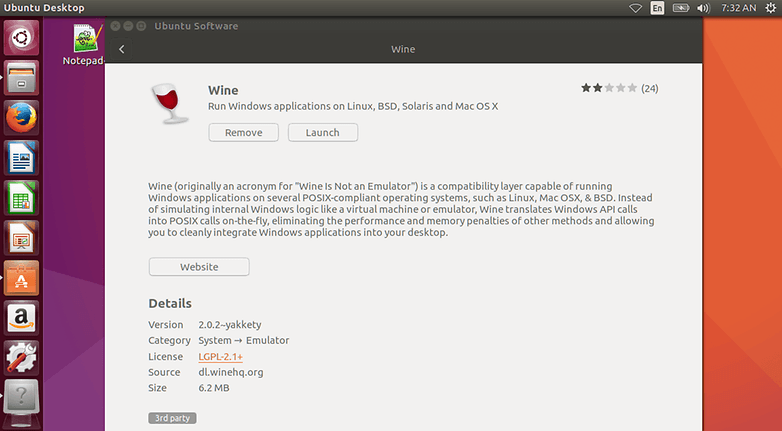
In short (very short) CrossOver's Android application uses Chrome OS compatibility with part of the Linux code. Chrome OS is based on this kernel (the heart of the system, the part of the code that talks directly with the hardware), allowing CrossOver to implement a level of Windows/Linux compatibility called Wine (Wine Is Not an Emulator).
Instead of simulating Windows internal logic as a virtual machine or emulator, the latter translates Windows API calls into real-time POSIX calls, eliminating performance and memory penalties from other methods and allowing you to cleanly integrate Windows applications into your device.
Installing CrossOver on Chrome OS
Before you can start using Windows software on your Chromebook you will obviously need to install CrossOver. Doing this is really easy, just go to the Google Play Store directly from your device and install the dedicated app. That's it!
Installing a known program
Obviously, you will not be left alone in the configuration of the app and in the installation of the libraries or dependencies necessary for the operation of the program you want to use, at least not if this program is known by CrossOver which in its archive contains more than 13,000 names and their configurations.
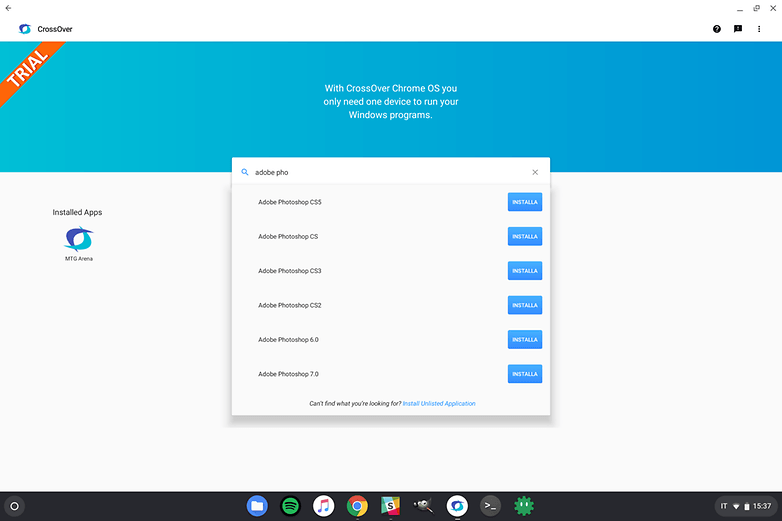
To check if the program you are going to install is in the list of known applications, just start typing its name in the search bar within CrossOver. A drop-down menu will show you some suggestions, click on the right name to start.
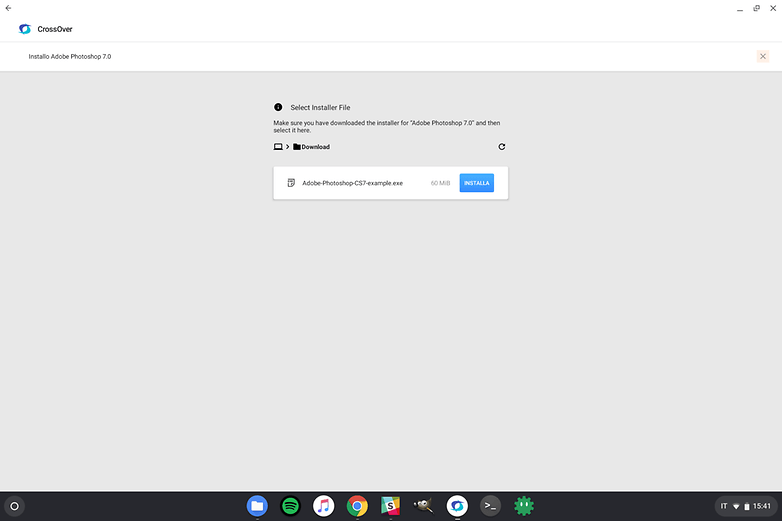
The app will ask you to select the internal memory of your Chromebook for the Windows installation file (usually with the extension .exe) and the program will automatically configure a virtual environment suitable for its operation and will guide you in installing everything necessary. For some programs, CrossOver will already know automatically where to find and download the installation file for you, which is great!
Now you just have to follow the classic installation procedure the same way you would on a real Windows PC. Once finished, in the home screen of CrossOver you will find a new icon from which you can launch the Windows program.
Installing an unknown program
If the program you want to try to install is not listed in the list of compatible programs, you will see a button called "Install Unlisted Application" in the drop-down menu. Click it to start the installation.
Warning: if the program is unknown to CrossOver, it may not work properly or you may need to manually configure the virtual machine needed to run it!
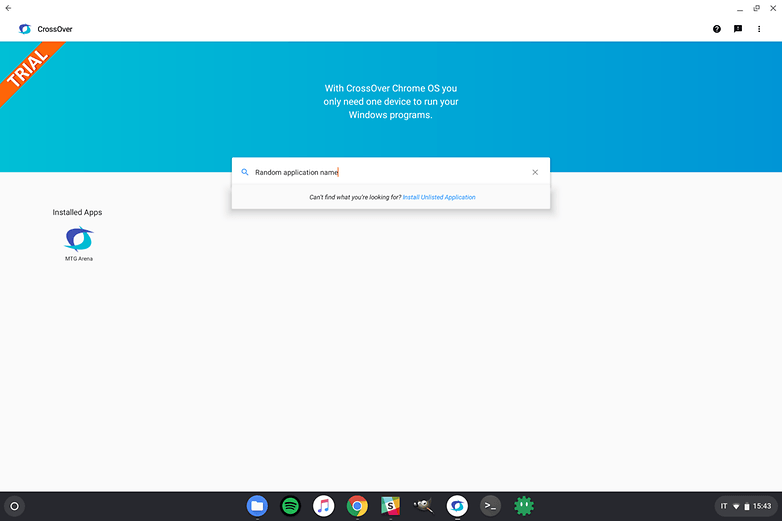
You will now be asked to enter the correct name for your program and select the necessary installation file from the storage of your Chromebook.
It will be shown on the screen the usual Windows wizard for the installation of the chosen program, in the home of CrossOver you will find a new icon from which you can launch it.
Installing additional libraries and dependencies
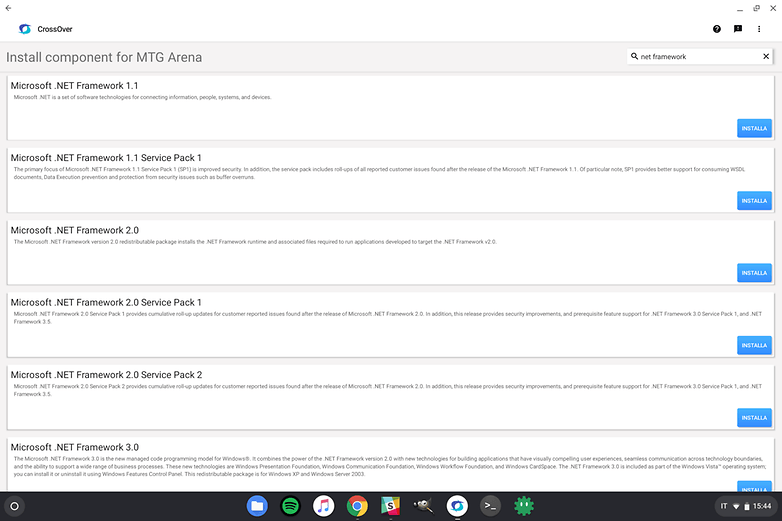
If your program requires additional libraries (e.g. .NET Framework) to be installed for startup, you can do so later once the main program is installed (or you can start the installation from these dependencies before installing the main program). To install new software in the same environment already created, click once on the icon of the installed program and then again on the same where it will appear the words "Manage ProgramName".
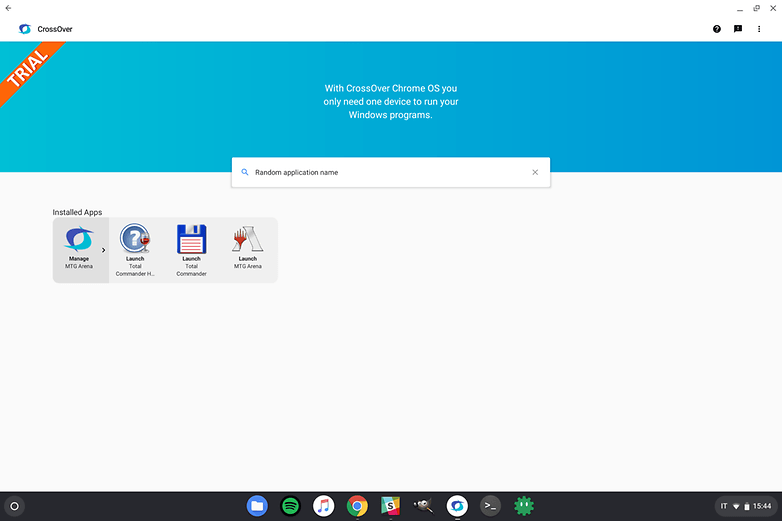
In the screen that will appear, click on the gear and then on "Install Component". As before, look for the auxiliary program you need and proceed with the installation wizard.
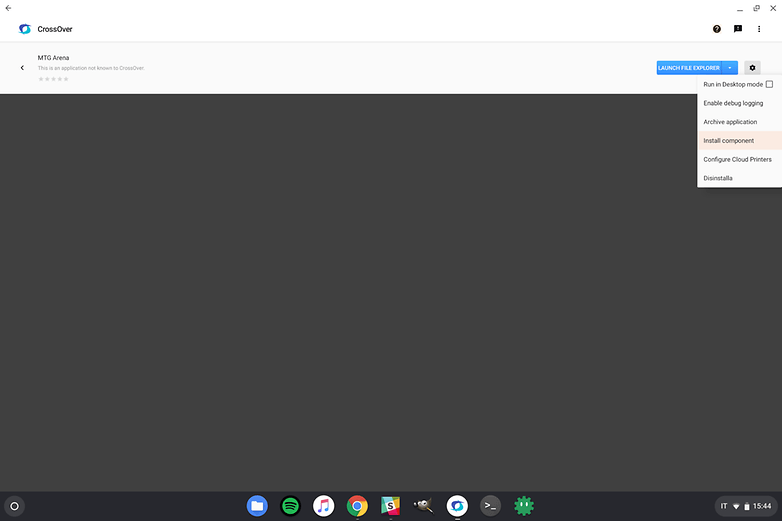
From the program management screen you can also configure Wine for a better yield, however, I recommend this route only to the most experienced.
Do you also need to use Windows programs on your Chrome OS device or have you found alternatives to everything? Let us know!
