How to install Android 5.0 Lollipop on a Nexus 7


It seems like we have been waiting for an eternity, but the factory images of Android 5.0 Lollipop for the Nexus 7 have finally been released. If you don't fancy the idea of waiting for the OTA update to hit your tablet, it is possible to manually upgrade your Nexus 7 right now. Need Android 5.0 Lollipop right now? Here's how you can install it yourself so you can enjoy all of the latest features and tools.

Warning: Installing a factory image on your Nexus 7 will erase any data currently stored on it. Before you start this process you should make sure that you have backed up everything you do not want to lose so you can restore it when the installation completes.
Prerequisites
You need a few things to start with:
- ADB tools and driver (download from AndroidPIT)
- Factory image for Nexus 7:
- Android 5.0 (LRX21P) "razor" for Nexus 7 [2013] (Wi-Fi)
- Android 5.0 (xxx) "razorg" for Nexus 7 [2013] (Mobile) **Link still to come!***
Then extract the downloaded files on your computer.
Unlock bootloader
You'll need to unlock your Nexus 7's bootloader. If you haven't done this already, here's what you need to do:
- Turn your Nexus 7 off.
- Press and hold Volume Down and Power to enter the Fastboot menu.
- Connect your Nexus 7 to your computer via USB cable.
- Go into the adb-tools folder and hold the Shift key on your keyboard then click the right mouse button on any free area of white space in the Windows Explorer window. Select ''Open Command Window Here'' with your left mouse button.
- Once the command window is open, enter the following command to unlock the bootloader:
fastboot oem unlock
- Press the Volume Up button on the Nexus 7 to accept the command and press the Power button to confirm. The bootloader will now be unlocked, and all data will be lost.
Install Factory Image
- Enter Fastboot by turning off your Nexus 7 and then pressing Volume Down and Power until Fastboot appears.
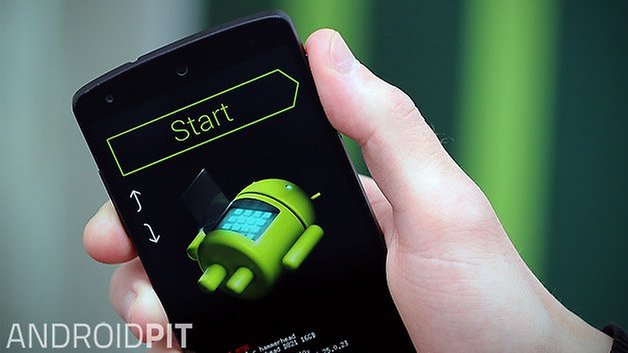
- Connect the Nexus 7 to your computer with a USB cable.
- On your computer, navigate to the unpacked directory that contains the factory image for your device.
- Double click the flash-all.bat file and wait until the installation is finished. Your Nexus will reboot itself after completion.
Troubleshooting
If you get stuck in a bootloop at the Google logo on startup, you can easily fix this:
- Disconnect your Nexus from your computer and turn it off.
- Press and hold the Volume Down and Power button to enter Fastboot.
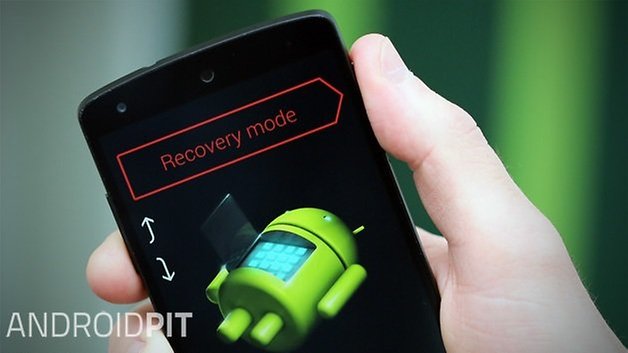
- Use the volume buttons to highlight Recovery Mode and press Power to confirm
- If you have a custom recovery like CWM you'll enter it immediately. If you see the Android laying on its back just press the Power button and Volume Up button briefly to enter stock Recovery.
- In the recovery menu, use the volume buttons to highlight wipe cache partition and press Power to confirm.
- Scroll down to wipe data/factory reset and press Power to confirm. Reconfirm your seelction and let your Nexus reset.
- If your Nexus doesn't reboot automatically you can select reboot sytem now from the menu and hit Power to confirm.
That's it, you're done. Your Nexus should now boot successfully. The very first boot process takes several minutes by the way, so do not be surprised if it takes longer than what seems usual.
So... have you manually upgraded to Android 5.0 Lollipop?








Yes! Did it as soon as the update rolled out and its awesome!
One question, will the last SuperSU work for the official release? Thank you ☺