How to set up your Moto G for the first time

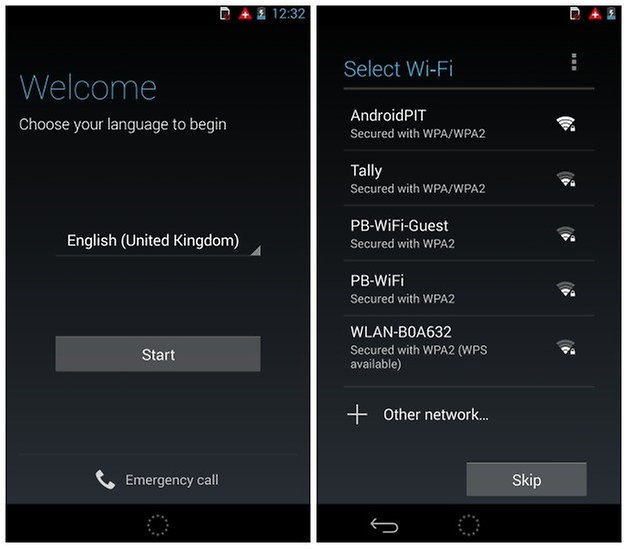
Just like many of the Google phones, including the Nexus 5, the setup process is quite similar. When you turn on your device for the first time, it asks you to enter your language of choice. Do so and press start. It will then take you to the next page to select your Wi-Fi connection. You can also leave this selection for a later stage. At any point, you can tap on the menu button, aka action overflow menu, on the top right hand corner of the screen to perform an Automatic setup (WPS).
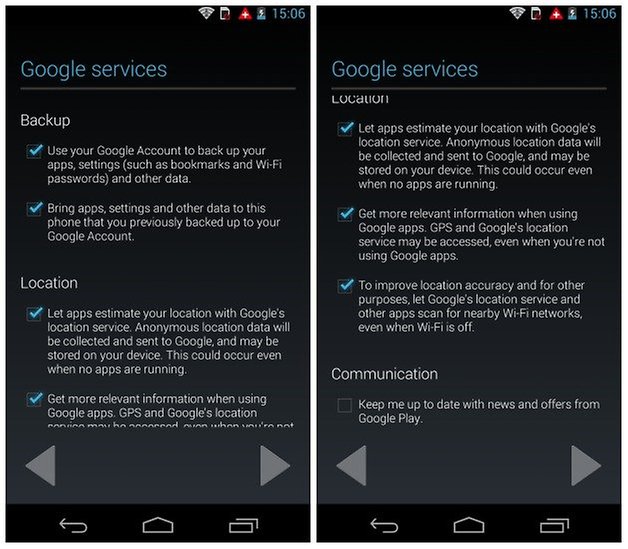
After you have connected to the Wi-Fi network, you will have to accept that Motorola collects your usage information to keep your Android smartphone and the apps on it up to date. Press continue. You will then be asked if you have a Google account (Gmail account).
You already have a Gmail or Google Account
If you already have a Google account, press yes and this will prompt you to enter your email address and password. It will then give you the option of restoring all the backed up information that is stored on Google Services, like the apps from Google Play that you have downloaded in the past. Restoring your account only takes a few seconds, though all of the syncing will take a little while as Google completely restores everything on your phone.
You don’t have a Gmail account
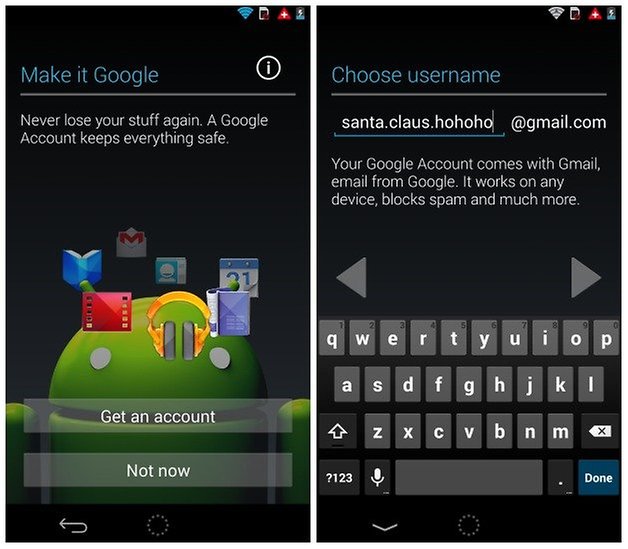
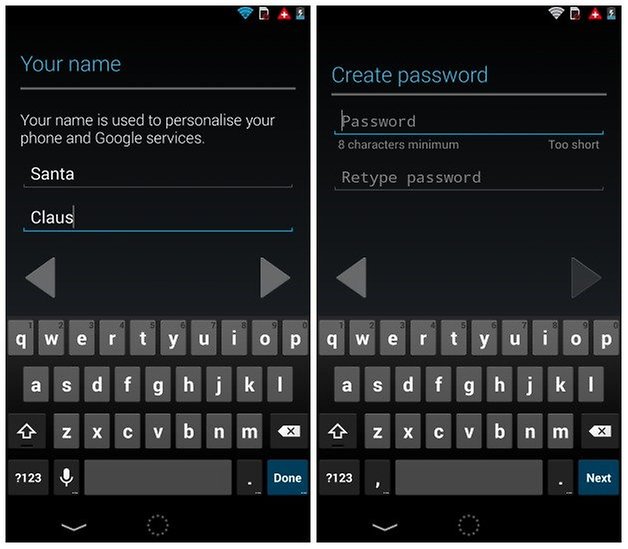
If you don’t have a Gmail or Google account, you can create one now by entering your name into the system, then creating your own email address and password. Usually people will use their own names, though you might need to add a number or a character in your email address if yours is a common one. It will also advise you to which degree your password is secure: weak vs strong.
When creating a new Gmail account, you will be asked whether you would like to create a Google+ (or G+) account, which is a social network along the lines of Facebook, which is owned and run by Google.
Google Wallet
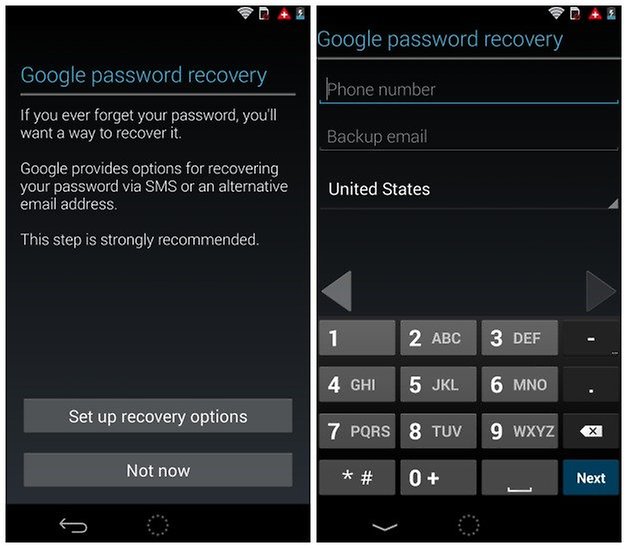
Once you have entered your existing Gmail account or created a new one, you will be asked if you would like to setup Google Wallet with a credit card to then buy apps, movies and books from Google Play.
Switching from your old phone to Moto G
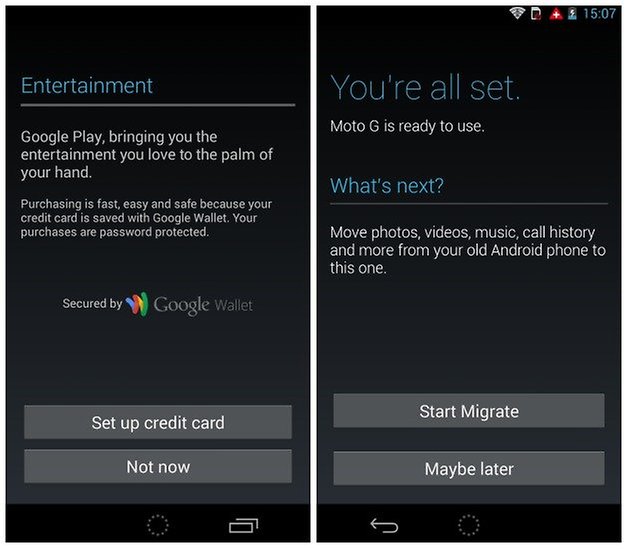
The words ‘You’re all set...’ will appear on the next page, under which you are asked whether you would like to migrate or transfer all your files, pictures, contacts etc from your old smartphone to the Moto G. Motorola Migrate is an app that was built into the Moto G for just this purpose, which isn’t usually found on even the higher end smartphones.
Finding the Notifications bar, Quick Settings and Settings
Whatever migration option that you choose, you’ll next be brought to the home screen of your Moto G where you are given a quick tutorial on the basic operations and how to find certain things, like your apps in the App drawer for example.
To find the settings of your phone, drag your finger from the top to the bottom of the screen to open up the notifications bar. Tap on the face/tiles icon on the top right corner to open up your Quick Settings. There you will find all the toggles to quickly turn off and on certain functions, like Wi-Fi, Airplane mode or Bluetooth to name a few. Settings is found there too, which leads you to the configurations of your smartphone.
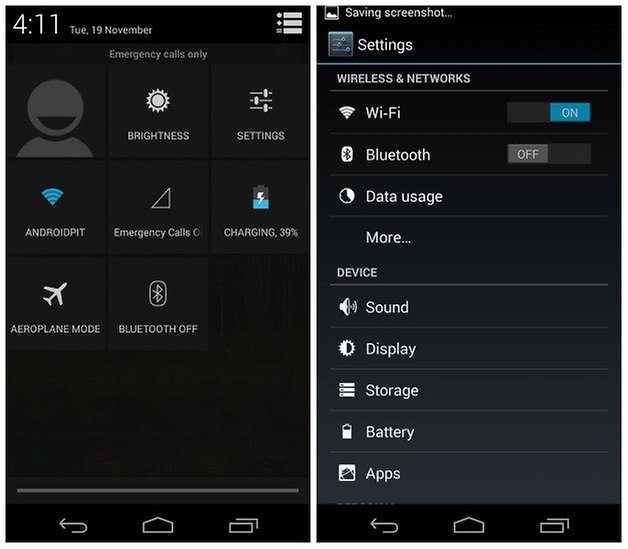
Change the wallpaper
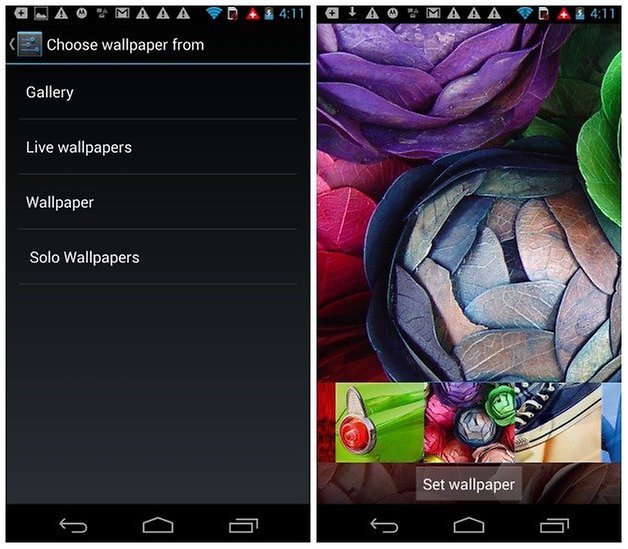
If you want to use the wallpapers that Motorola has made available on the Moto G, choose Display when you are in Settings. Here you have the options of selecting photos from your own gallery, or live or normal wallpapers from Motorola, which are quite vibrant and fun. Live wallpapers look great, adding moving images to your home screen, but they drain your battery faster.
It will take you some time to get your head wrapped aroung the Moto G if you are a first time user of a smartphone, however the Moto G is set up in a way so that the learning curve is quite flat and easy to overcome.
Enjoy your new Motorola Moto G!



stop teasing us ;) still not got a delivery date for mine!