Set It and Forget It: Scheduling Messages on iOS 18 Like a Pro!
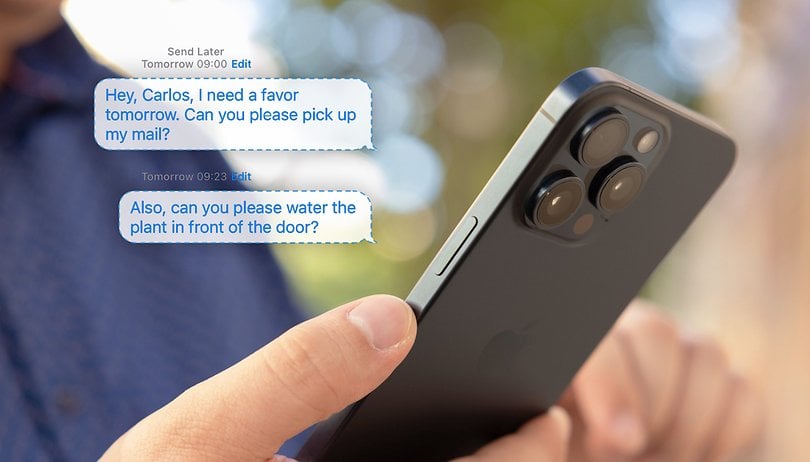

With iOS 18, iMessage introduces some neat features, including the ability to schedule messages, making it easier to stay in touch with friends and family. I’ve already started using the new “Send Later” option, and here’s how simple it is to schedule messages with this new feature.
I’ve been using the new iOS 18 on my personal iPhone, and it’s been quite stable with only a few minor issues. However, since it's still an early release, you might want to be careful before installing it on your device. If you're eager to try it out, here's our quick guide on how to install the iOS 18 Developer Beta on any iPhone.
In the coming days, I'll be sharing some quick tutorials on iOS 18 that I believe enhance the iPhone experience. My first tutorial covered the new Dark Mode setup, and today, I’ll show you how to use the "Send Later" feature. Here are some interesting ways this feature can help you manage your communication:
- For birthday and anniversary reminders.
- Send professional messages during business hours.
- Perfect for sending messages to friends or colleagues in different time zones without disturbing them at odd hours.
- Use it to send reminders or coordinate plans.
How to schedule messages in iOS 18 with the "Send Later" option
iMessage finally joins the ranks of apps that let us schedule messages, and the wait has been worth it. Now, scheduling messages is a breeze. Here’s a step-by-step guide on how to use the new “Send Later” option in iMessage:
- Launch the iMessage app on your iPhone.
- In the bottom-right corner, tap the plus (+) to start a new message.
- Scroll down and tap on the More option.
- Tap Send Later to access the scheduling feature.
- Type your message and then tap the blue timestamp.
- Pick the desired date and time from the picker.
- Tap Send to schedule your message for later.
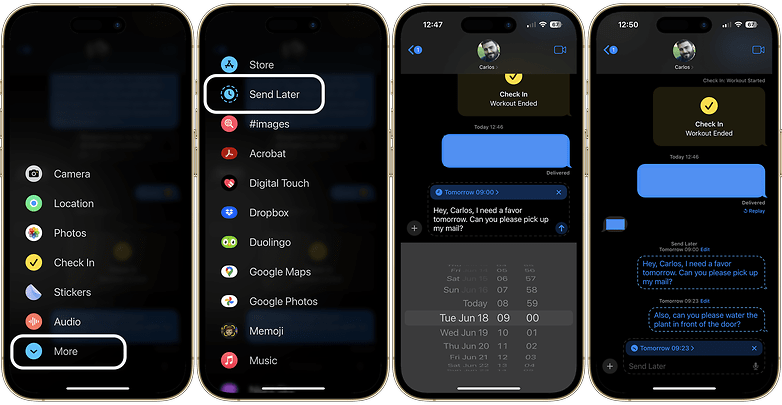
If you no longer need to send the scheduled message and want to cancel it, it's easy to do. Just long-press on the scheduled message, and the option to delete it will pop up.
That's it! With these simple steps, you can take full advantage of the new iOS 18 features to make your iMessage experience more efficient and convenient. Give it a try and start scheduling your messages today!


